Its been a busy week! Prior to finishing this Super Mario Bros light, I had to print and modify a BLTouch mount to replace my Artillery Sidewinder probe that went bad for the second time. Then I swapped out the warped glass plate for an aluminum plate with a PEI magnet sheet. Finally, I printed a mount for my Pi Cam after having it Scotch taped to my desk next to the printer for the last year or so.
Just have to finish up the power wiring on the light:

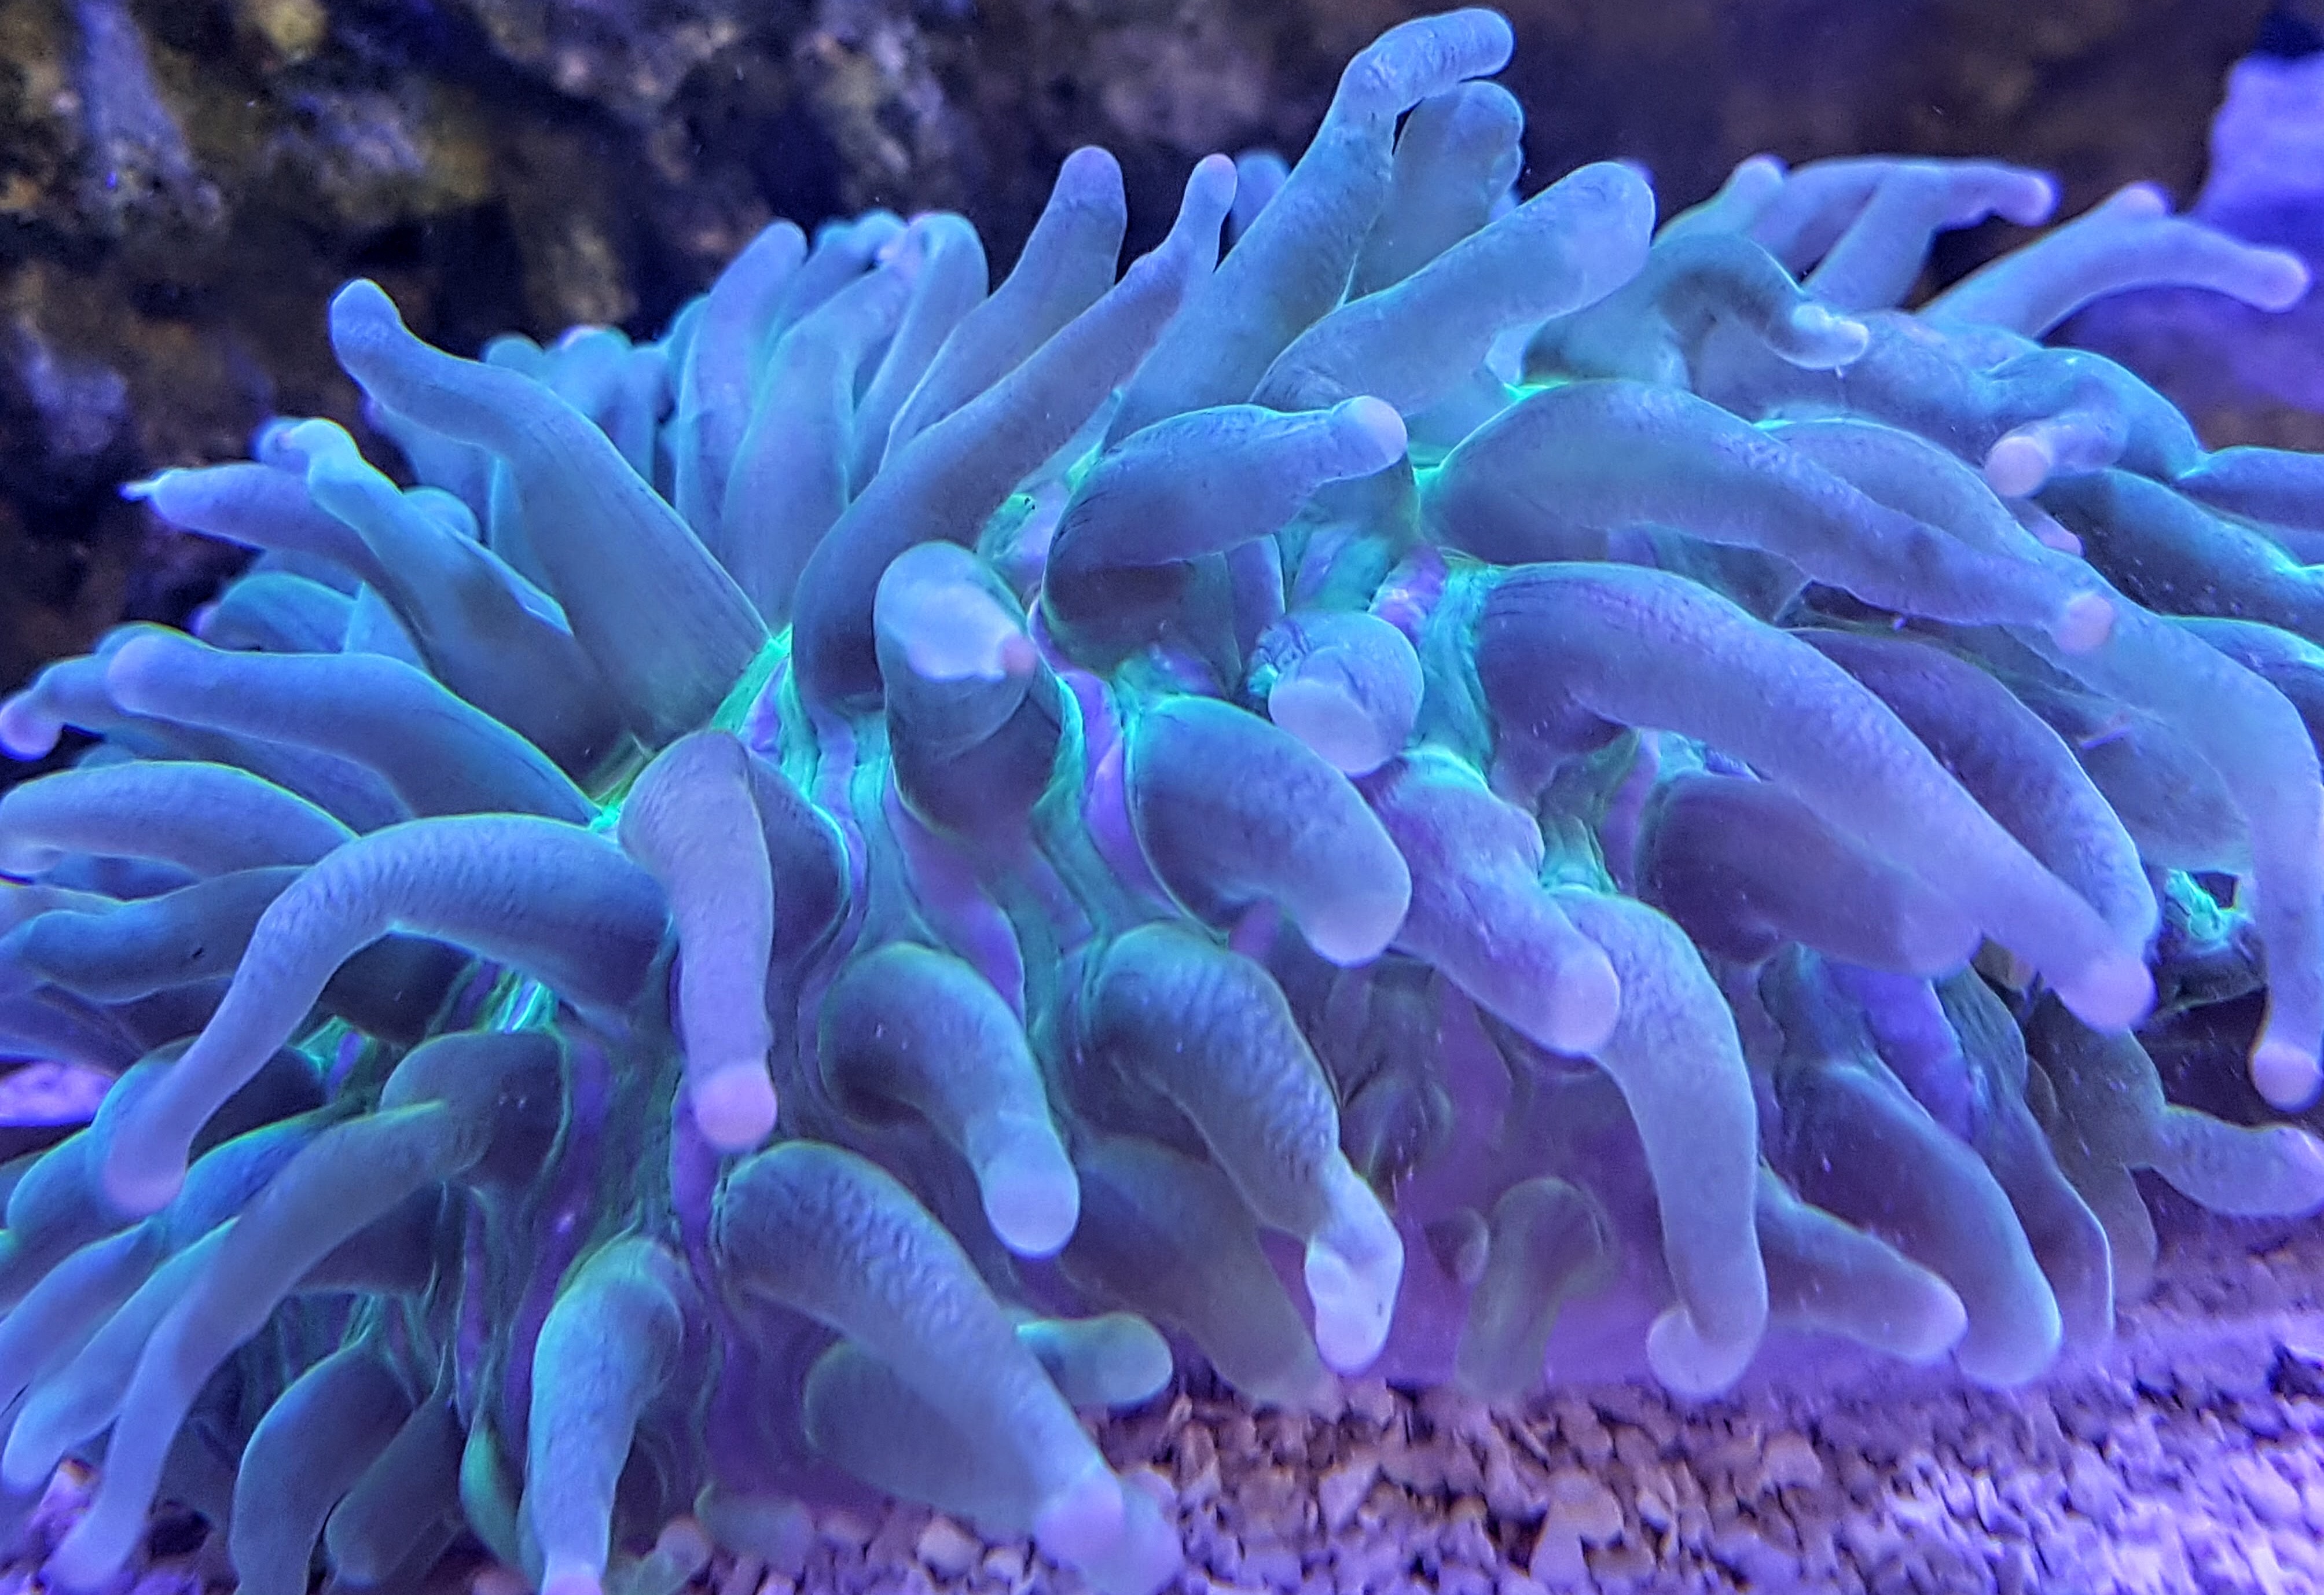
This is phenomenal. You’ll have to share it in a darker space so we can see the glow better.
Just got it finished and hung on the wall. The camera lens doesn’t do the thing justice. I’ve tried adjusting the white balance so the yellow isn’t so washed out but you still can’t see all the silhouettes shining through in the photo. Model can be found on Cults (paid) if anyone is interested in doing their own.

That is super cool
TPU drive belts for a robotic pool cleaner
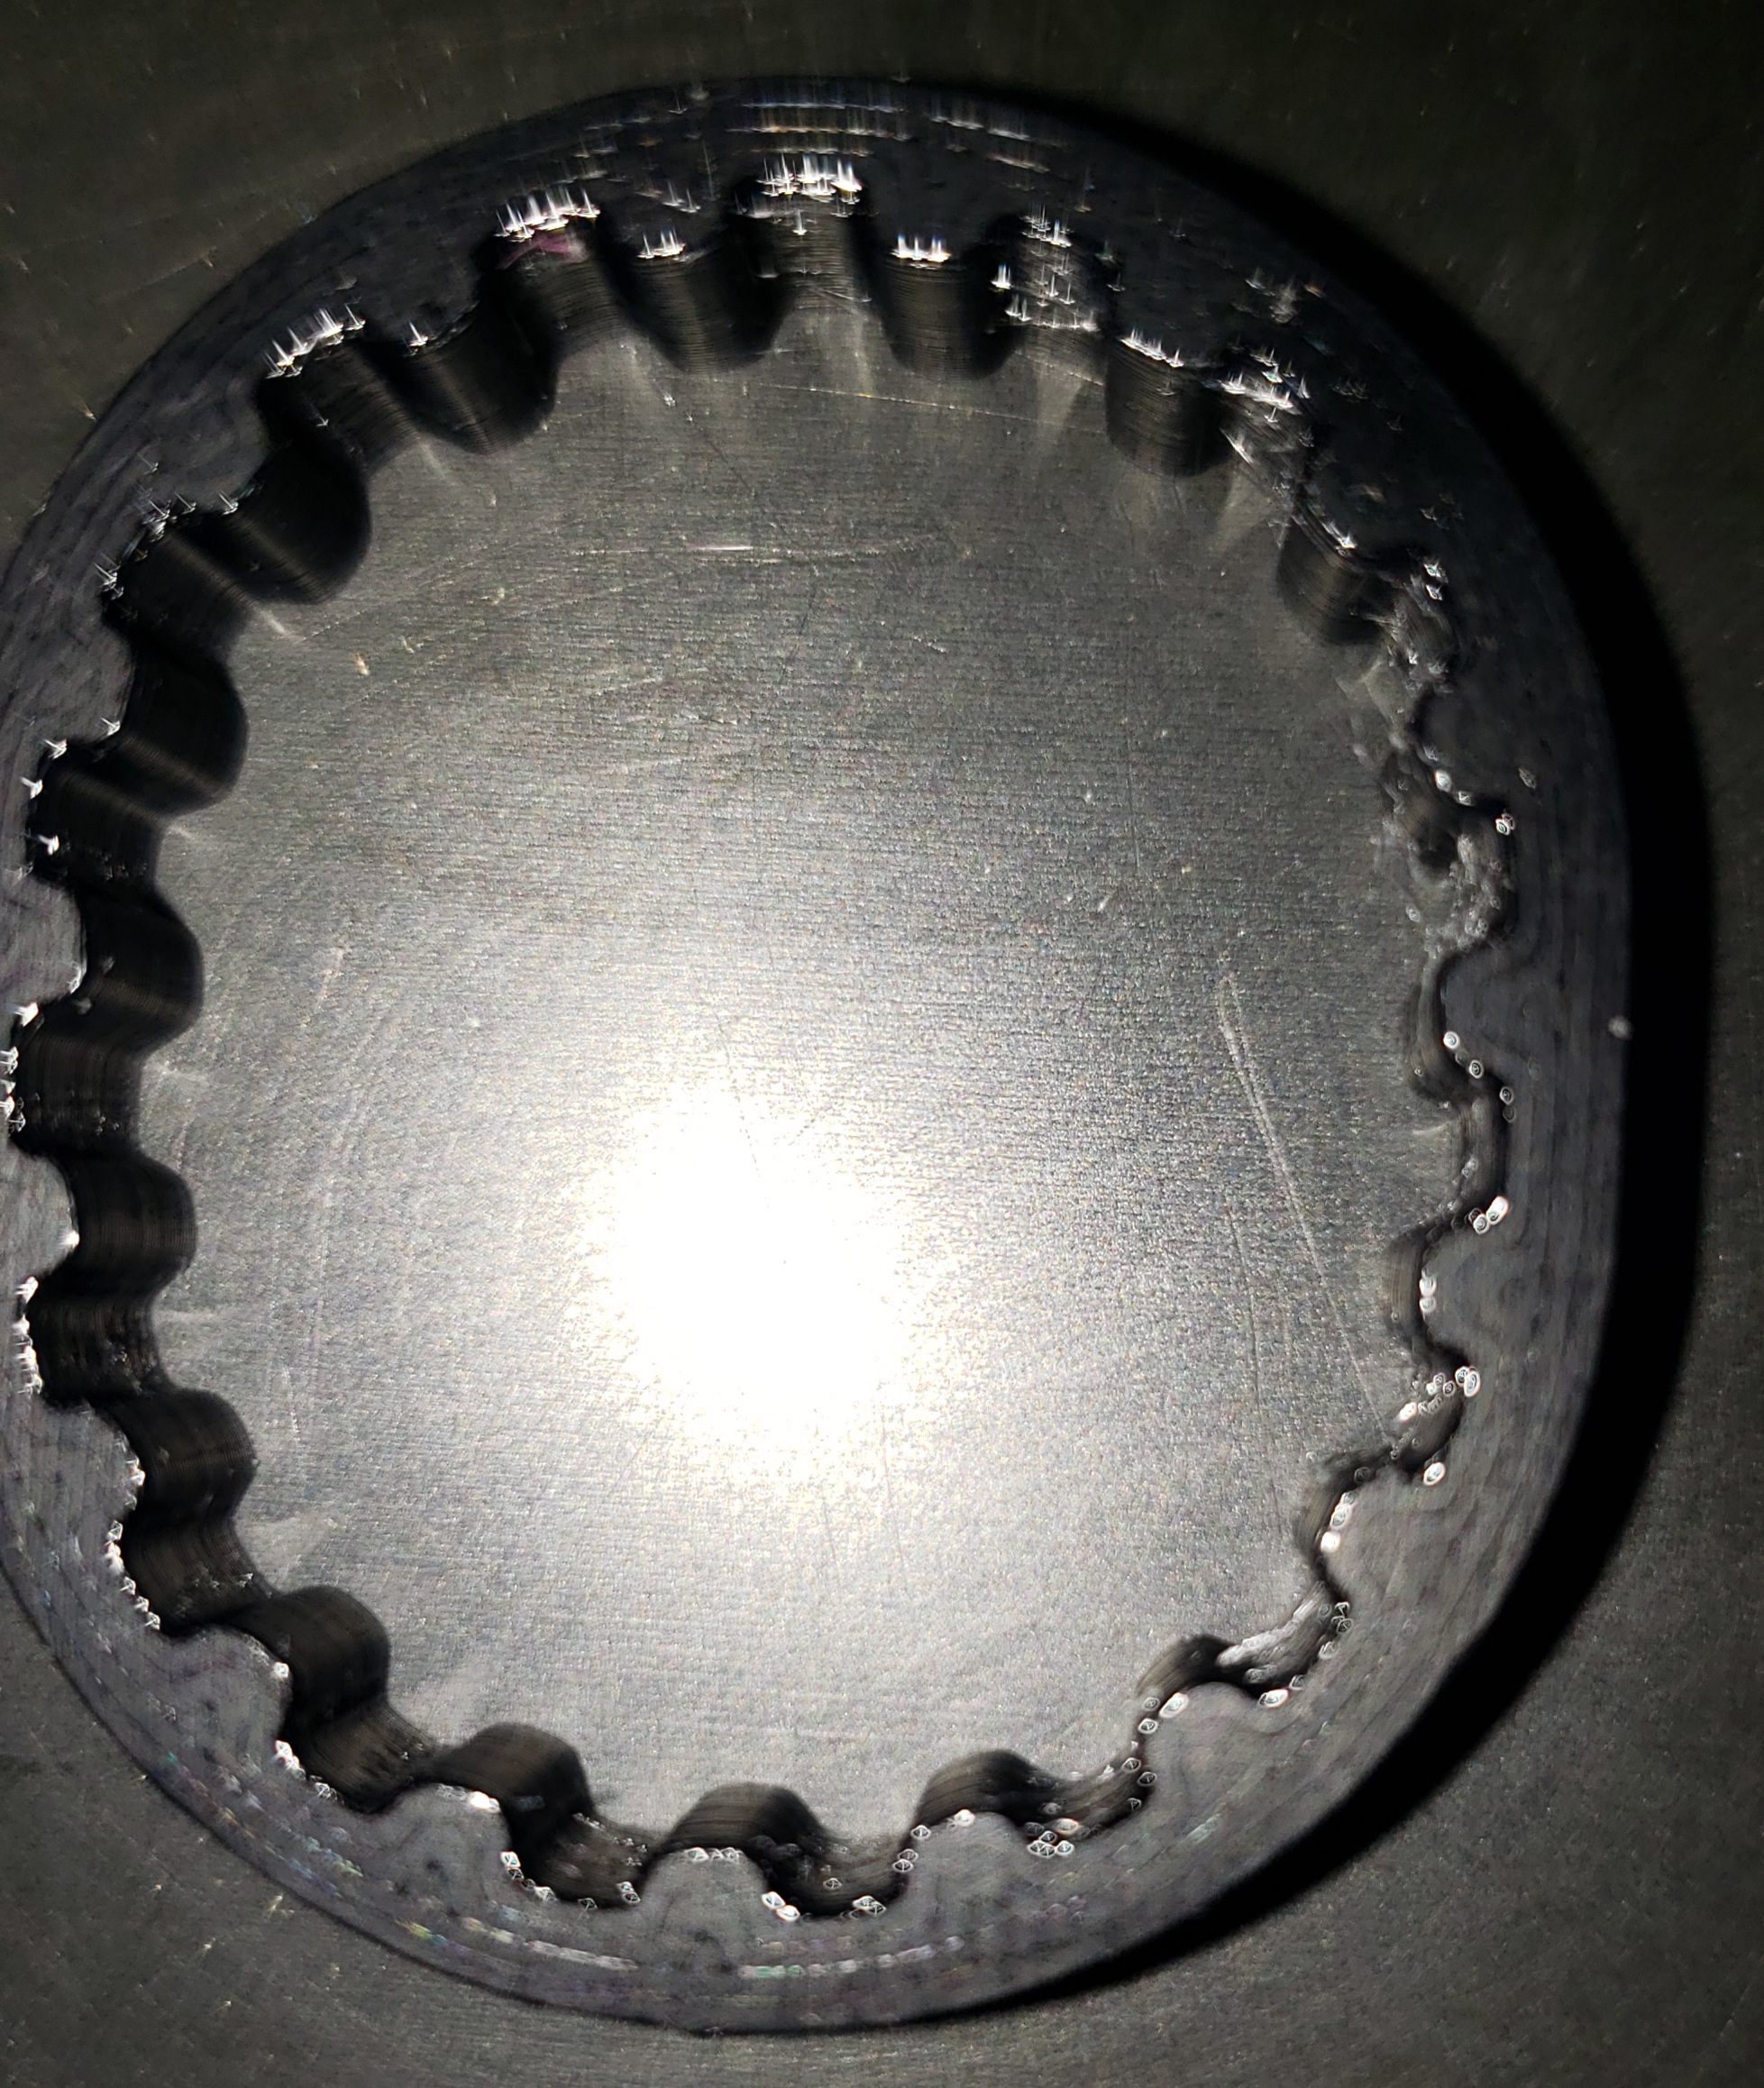
Is that top layer ironed? It looks very clean
I wish, but I think I flipped it over and that’s the side that was on the bed. My TPU top layers always look like crap.
After I finish wiring up a new board (BTT Octopus), I’m going to start the OG Star Tracker
Just finished a roadrunner, currently printing an Academy Award for the wife, to be followed up with a Wile E Coyote to go with the roadrunner.
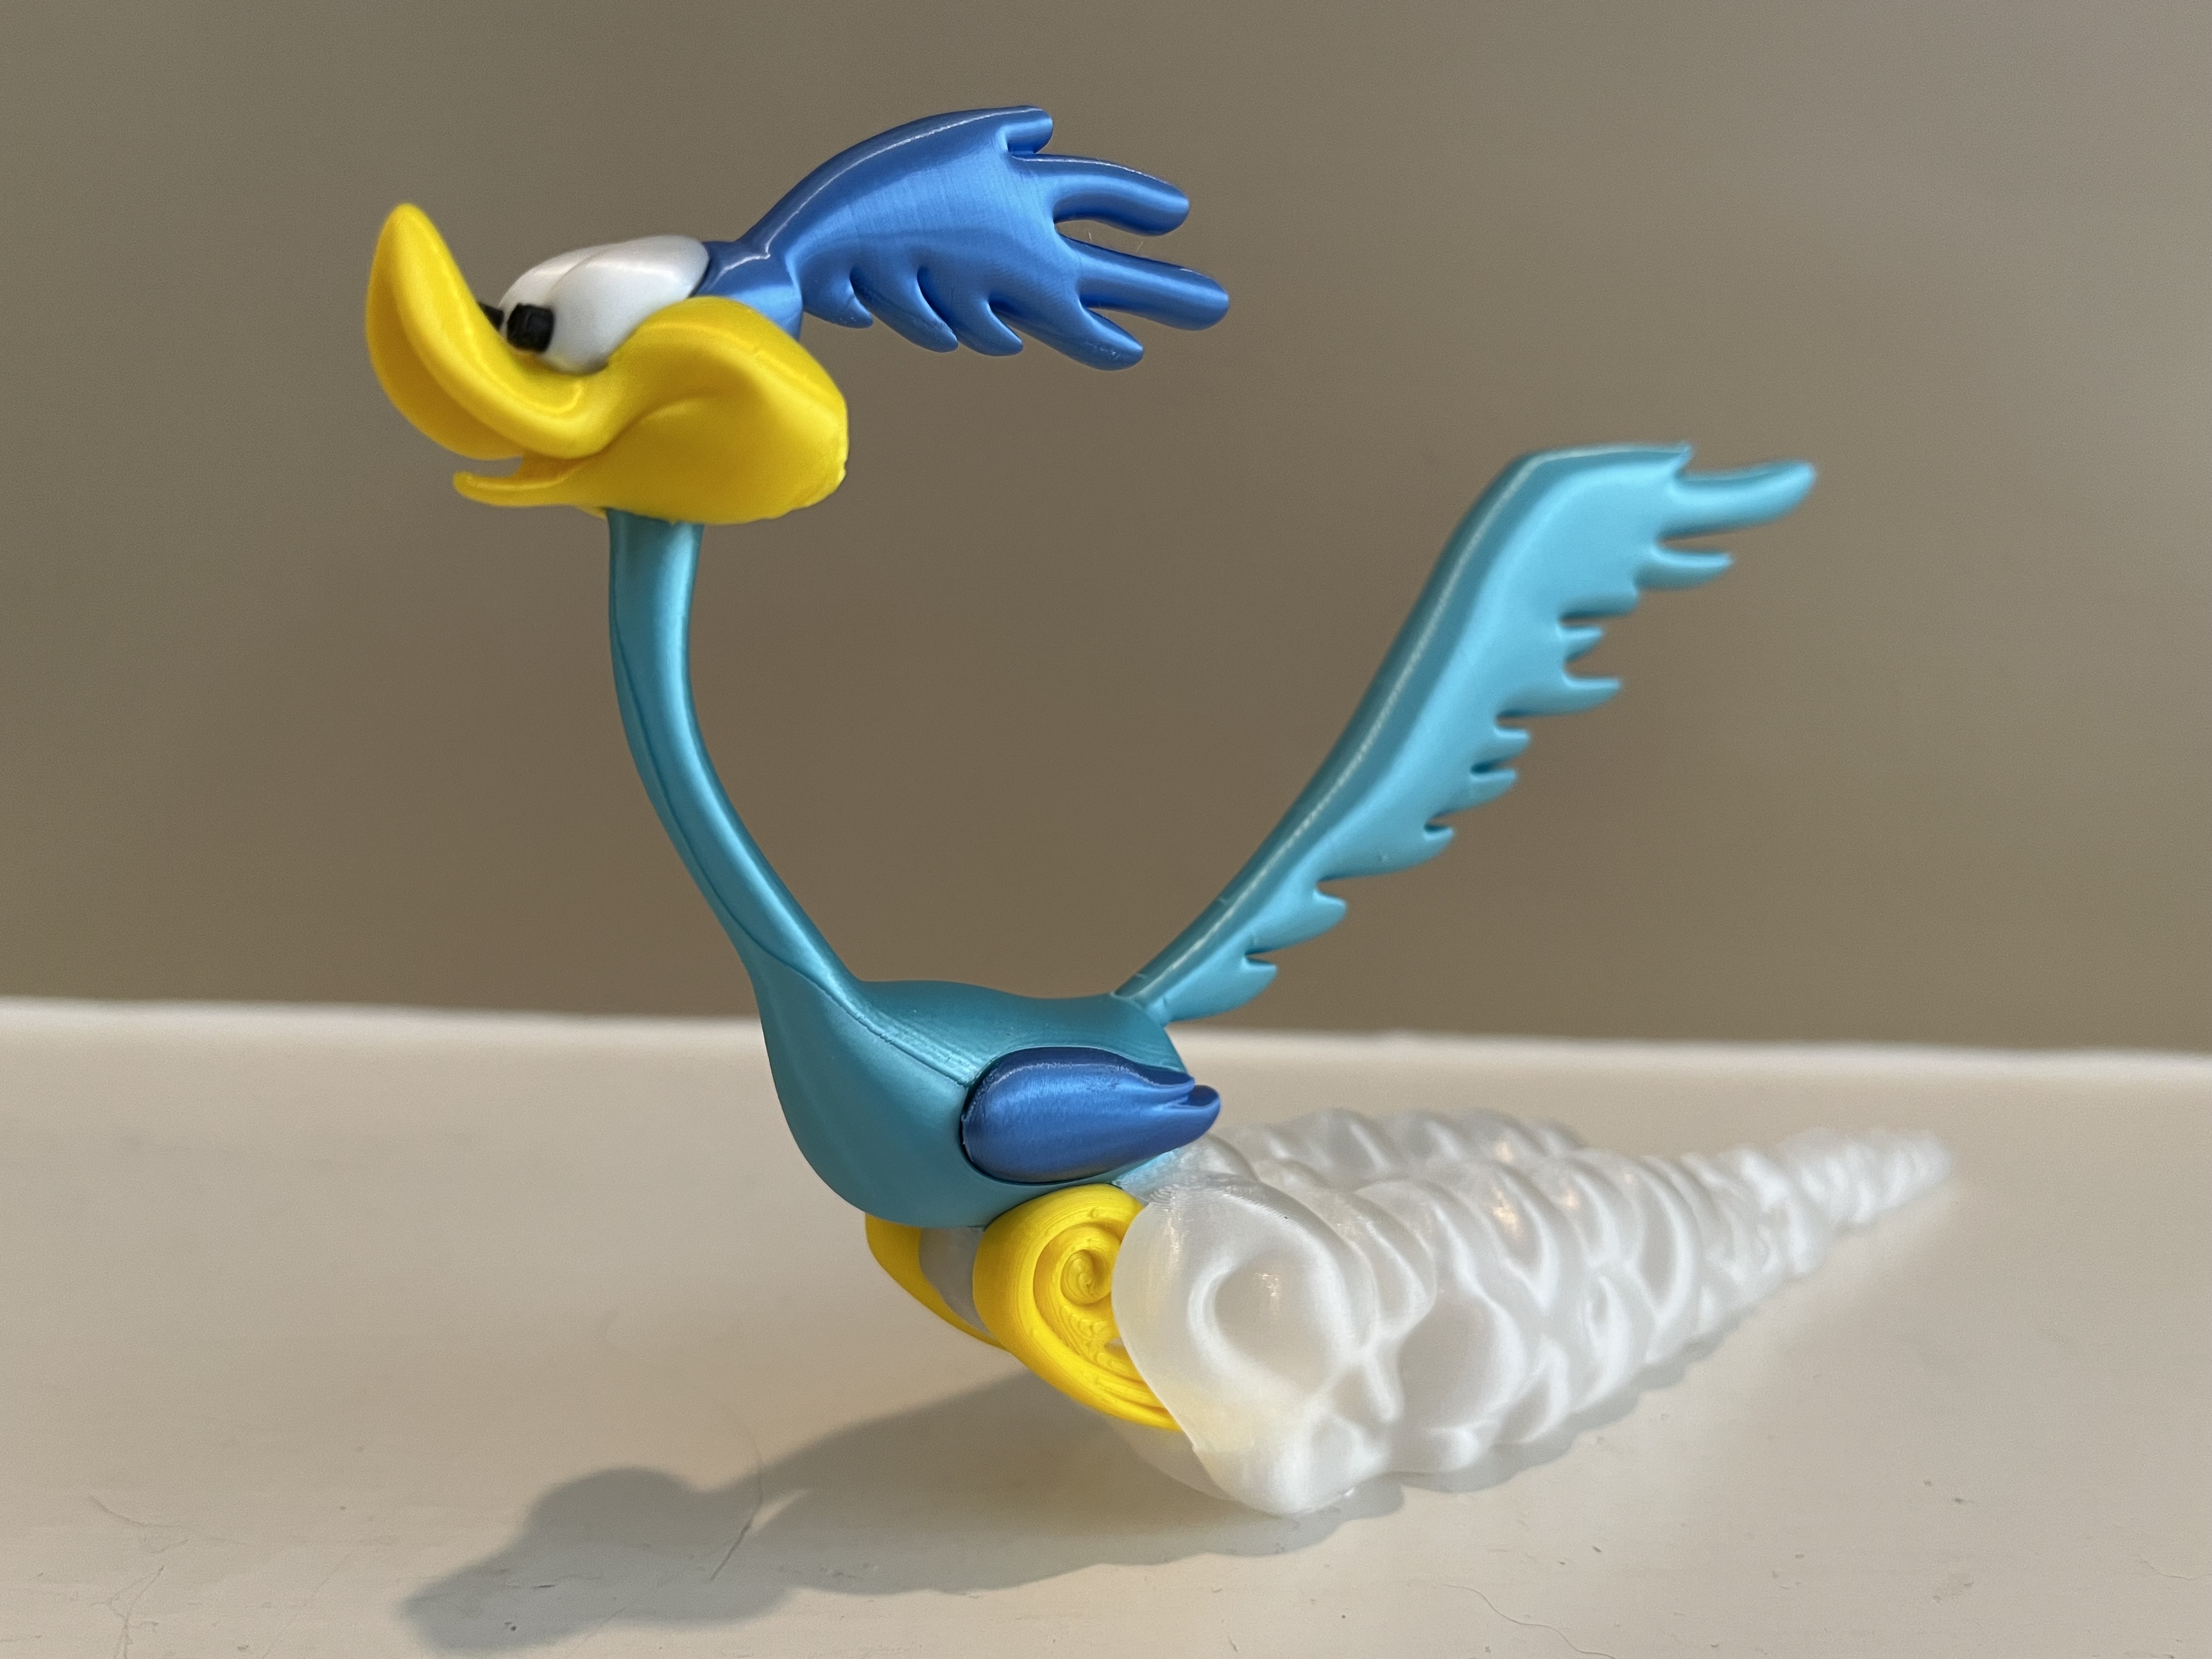
This looks awesome! I haven’t really seen 3D printed figurines with so many different colours/parts.
These types of models are easy - the modeler has split the model into seperate parts/objects designed to be printed in different colors. So all you have to do is print all the parts that are color X, change the spool and print all the parts that are color Y, so on and so forth, then glue them together.
 Cat Deterrent model I designed since one cat dive bombs from door edge semi frequently. At some point will probably release the 3d models for it. Designed it in Alibre Design Pro.
I designed a gear fidget spinner with an R22 ball bearing. Printed on a Prusa i3 MK3S+. Black and silver pla and purple pla.

A freak accident put a piece of filament into my hotend cooling fan. Like a hickey stick to a bike wheel. Things went poorly. So until I find the time to replace it, I’m printing nothing.
However if I was operational, I’d be printing a mix of dungeon tiles for a dnd one-shot this summer and Barbie-scale accessories for my kid.
This is really easy to do since the filament comes out stringy and the fan sucks anything nearby into it. Ive started conciously pulling out stringing filament from the side opposite the fan since doing the exact same thing to mine previously. I suggest buying a multipack of fan replacements as they’re cheap crappy fans anyways.
Good advice. Mine came from a broken filament at the extruder. When I backed it out, the new end swung around and into the spinning fan. Not my favourite moment.
I am trying to improve my lithophane business card. Only one Crash so far…
Also planning on printing a TPU version of a keychain I designed that is an Atari Controller. It’s too fragile for a pocket in normal filament. Wish I had a tool changer, so it’s going to just be all black I think. [https://www.printables.com/model/491788-atari-joystick-key-chain-with-no-key-chain-option](Atari Keychain)
I’ve not used a 3D printer for years because I don’t have room for one. If I had one I’d probably be printing vases for my plants. I’m new here from Reddit and I browsed regularly to keep me inspired for when I finally get a printer.
Even after buying one you might find that you still haven’t used it for months on end. It can be extremely frustrating but rewarding when things work.
Once you fully design and print something from scratch you’ll be riding that high for weeks because you’ve created something from nothing but a bunch of bytes and plastic string.
Some of the newly released printers are insanely feature rich and worth looking into. The Ender 3 is still a great budget option too if you don’t mind some tinkering and winding up with the printer of Thesius after all the mods/changes you’ll wind up making to it.
@mibzman Mostly temperature towers, honestly. I’ve been playing with PHA, so I printed temperature towers for two new colours of that, and also I subscribe to the protopasta “endless filament” programme (at 150g/month, supersized samples really but I like it) and those showed up so needed one for each of them.
I _really_ like the bottle colours they sent out this month, particularly the blue. Just gorgeous.
@mibzman (Hi from Mastodon! Replies work, yay! But the photos don’t show up. Dang. xD )
@mibzman Link to photos since the embeds didn’t make it over:
@fedops @mibzman PHA is _pretty interesting_. More heat tolerance even than HTPLAs, but definitely also more flexible at all temperatures, which can be a plus or a minus - it’s kind of like a less-flexible but more-durable nylon, I think? I haven’t worked with nylon but from descriptions.
It also really wants a 0.6mm nozzle, though I have found - and this is what I did for these temperature towers - that the non-wood-infill PHAs can be consistently successfully printed with a 0.5mm nozzle, if the model is sliced for 0.4mm.
Also: Sure! I’d expect the pictures to work on actual Mastodon. But they didn’t make it to Lemmy replies. Don’t know if Lemmy even supports pictures in replies locally tho xD
@fedops @mibzman If you want to grab this purchase-advice reddit post before the walkout for later reading (or come back to it on Thursday), it isn’t bad at all, even if OP’s hate-on for Creality is overwrought. (It’s also not completely insane, but.)
https://www.reddit.com/user/richie225/comments/rnillw/generic_fdm_printer_recommendations_2022/
@moira thanks, yeah! My preferences align quite well with that, interesting. 😄
The Neptune and Sovol are high on the list, though I am strangely fascinated by Deltas (I partly blame @Tay0 for that) and Klipper so the V400 is at the top right now. Prusa would be a good choice also I’m sure, I know a couple ppl who have them and like them a lot.
@mibzman
Possible. Still seems like magic to me I can follow this community also in Tusky through Mastodon. 😄
I just printed a cable holder for my old macbook charger, one of the foldable hooks broke off. I love fixing broken stuff with my printer!
I’m also experimenting with printing dnd minis with a 0.2 mm nozzle. It mostly works but not quite as good as I would like it to.
You should try a smaller nozzle like 0.15 or 0.20 so you can do clean 0.10mm layers
I’ve been doing 0.08mm layers with a 0.20, I think I just need to be a bit more aggressive with supports. The part has a lot of thin overhangs, which have been blobbing really bad.
Have you played around with the Support Z distance, Support Top Distance, Support Interface? By default (at least with Cura), supports sit a layer or two below where they’re supposed to contact the print so you get shitty overhangs 100% of the time. The tradeoff is that you can easily remove them from the print. You might also try out Tree supports if you haven’t already. They’re a breeze to remove even with zero offset.
Designed a model railroad car that holds a Raspberry Pi Zero and camera module for first person view in real time from a model train. My dad and I have been working on this concept for a while and my latest idea was to put a micro servo on it to steer the camera. We 3D printed a mount with swivel for the camera that holds a servo and bent some stiff wire to make linkages.
My most recent improvement to the design was learning how to use Blender enough to model a 3-part power supply box to house a series of electrical modules to convert the track power into a stable 5V for the Pi and condensed it into a small box that fits on the car alongside the Pi and camera system. The box contains a rectifier, switching regulator module, lithium battery charger module, and battery.
I also modified a model railroad truck (wheel assembly) model I found on Thingiverse to add DIY power pickups, bent a bare copper wire into a makeshift spring that contacts the wheels and a place for the wires to attach that feed the power box.
Wow, that’s really cool! You should totally post pictures or a video.
I made a post a few weeks back for our original design:
https://mastodon.social/@CalcProgrammer1/110456485998532640
I haven’t posted anything about my new design though, as I made my own flatbed car model while that one was a model I found on Thingiverse. The power circuitry was also on a separate car in that test which is why I made my power box design. The model railroad layout is at my parents’ house so I have a short loop of test track I’ve been using to test my new design at my house which is absolutely not as interesting.