

- cross-posted to:
- knives@sopuli.xyz
- cross-posted to:
- knives@sopuli.xyz
That’s right, I’ve been at it again.
(And if you want to fast forward through all the foreplay and get right to the action you can download the models package here. Merry Christmas, ya filthy animals.)
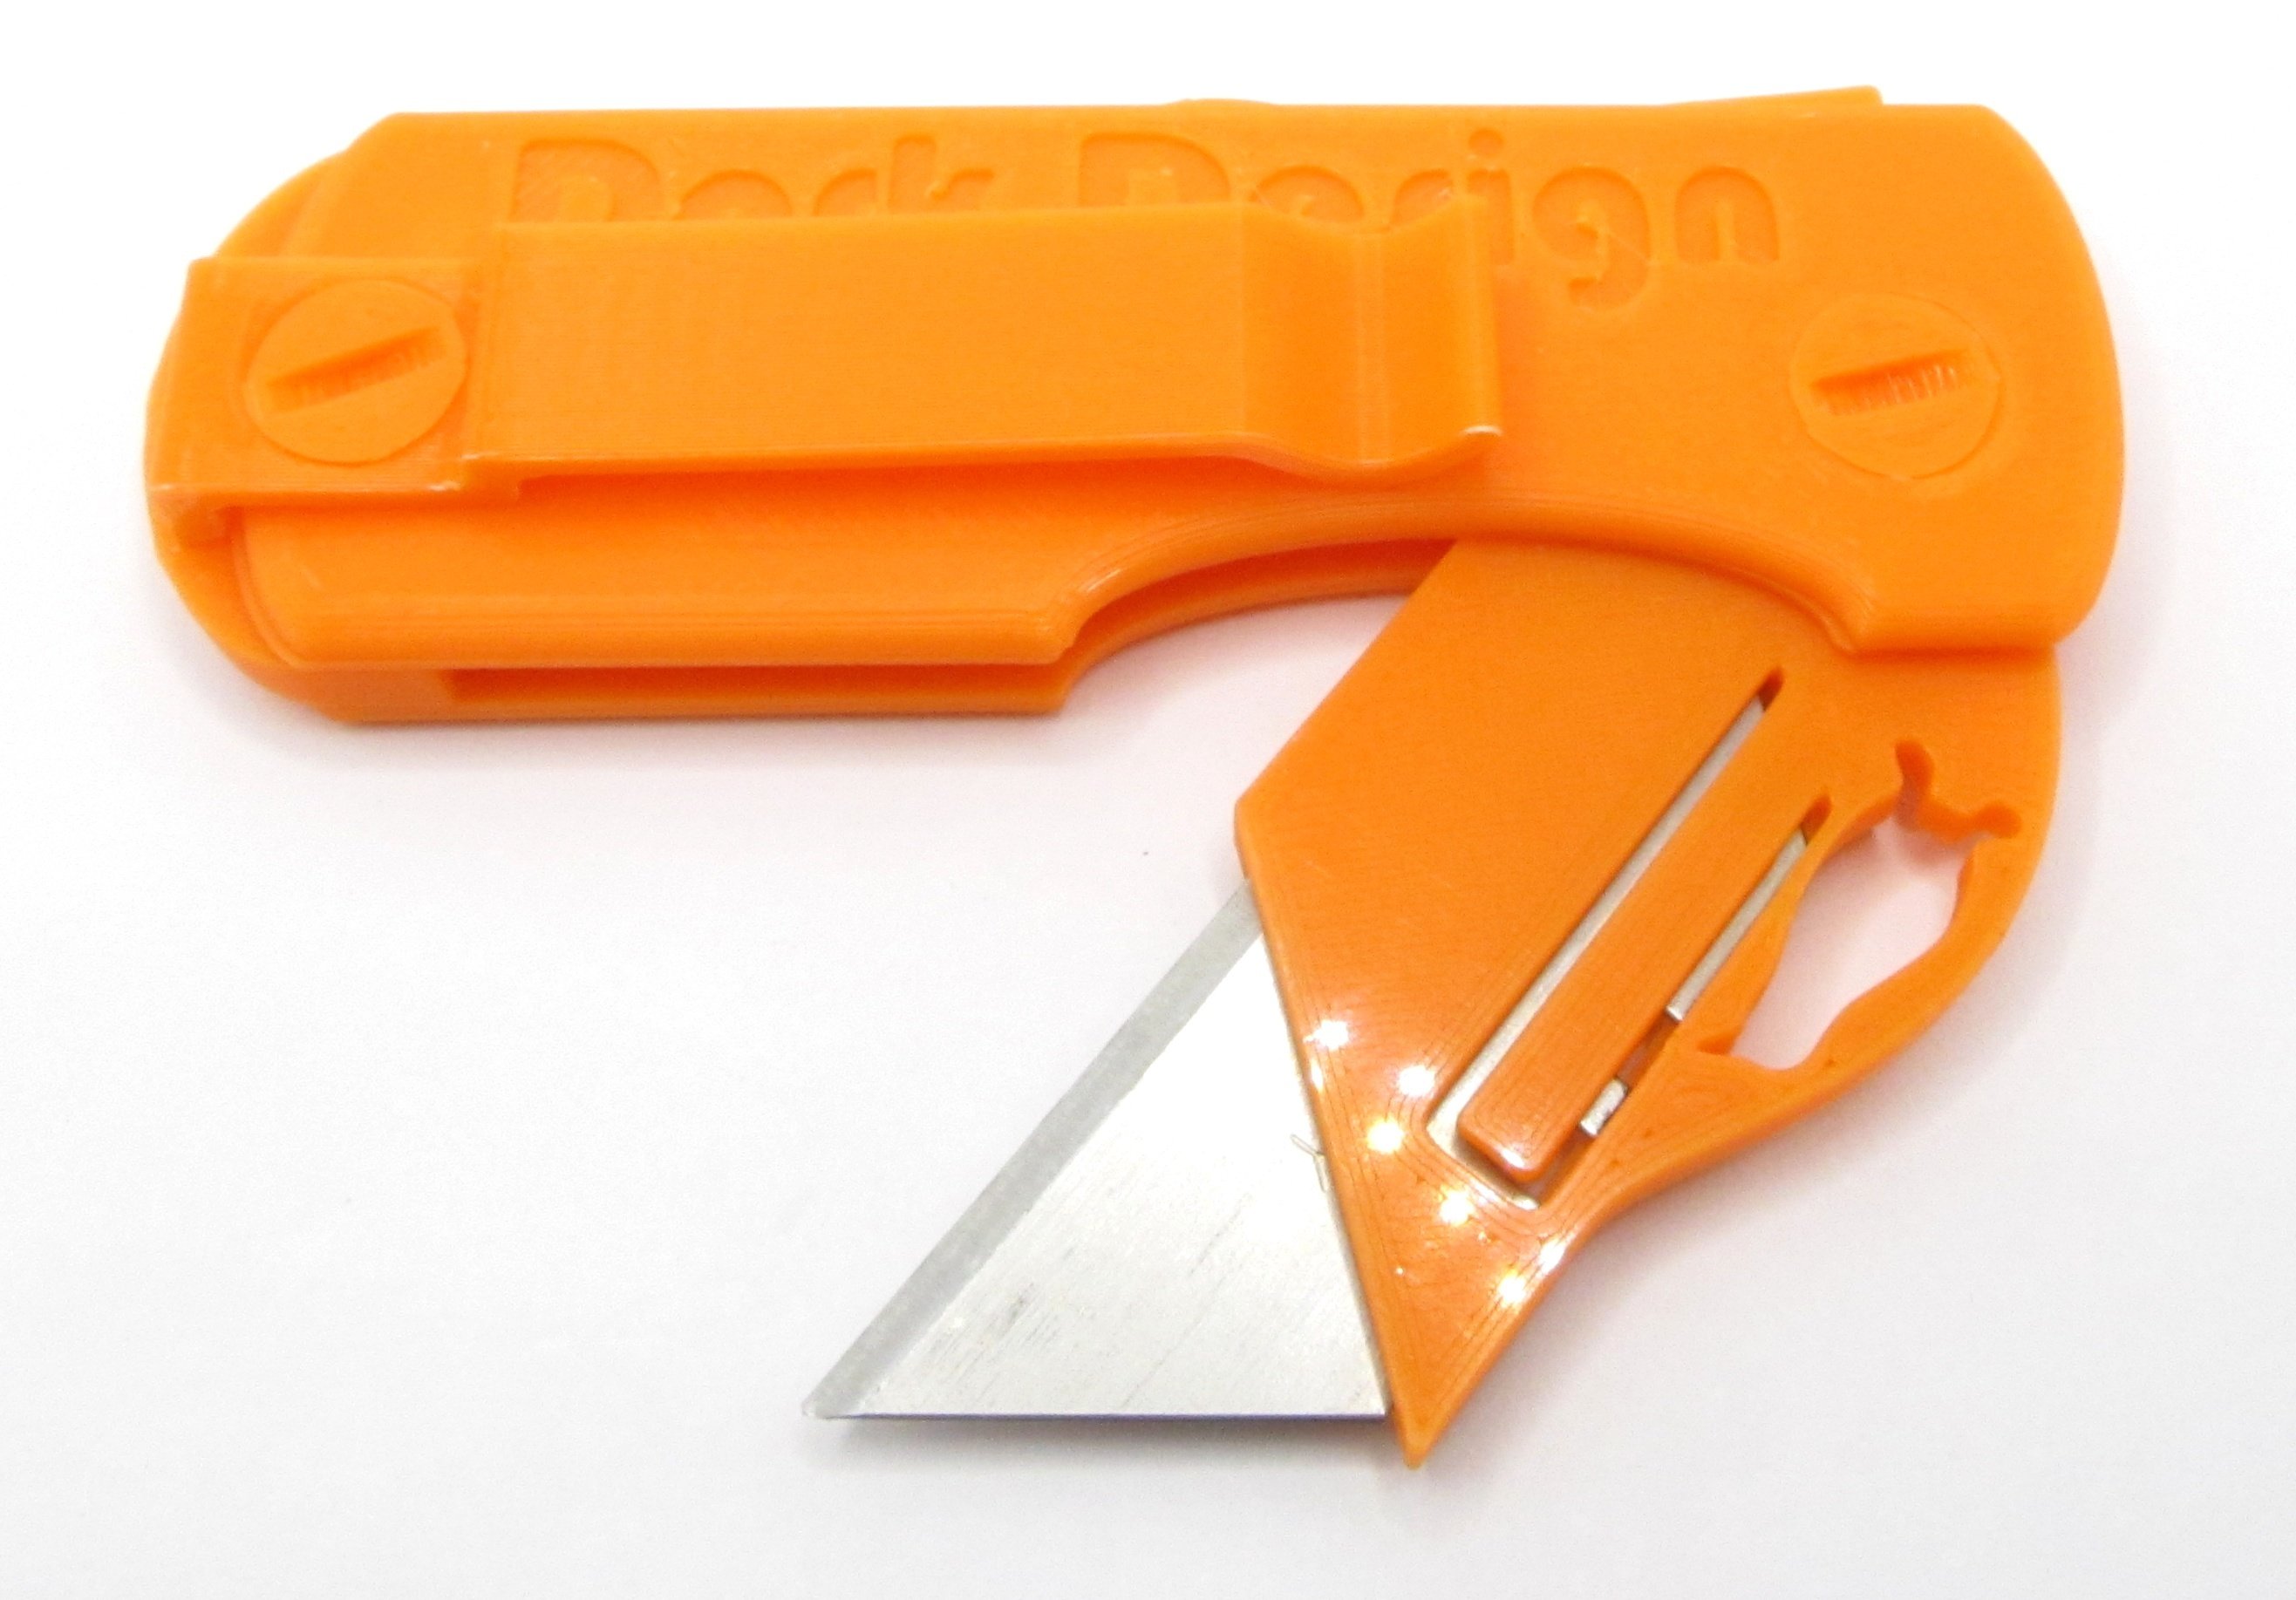
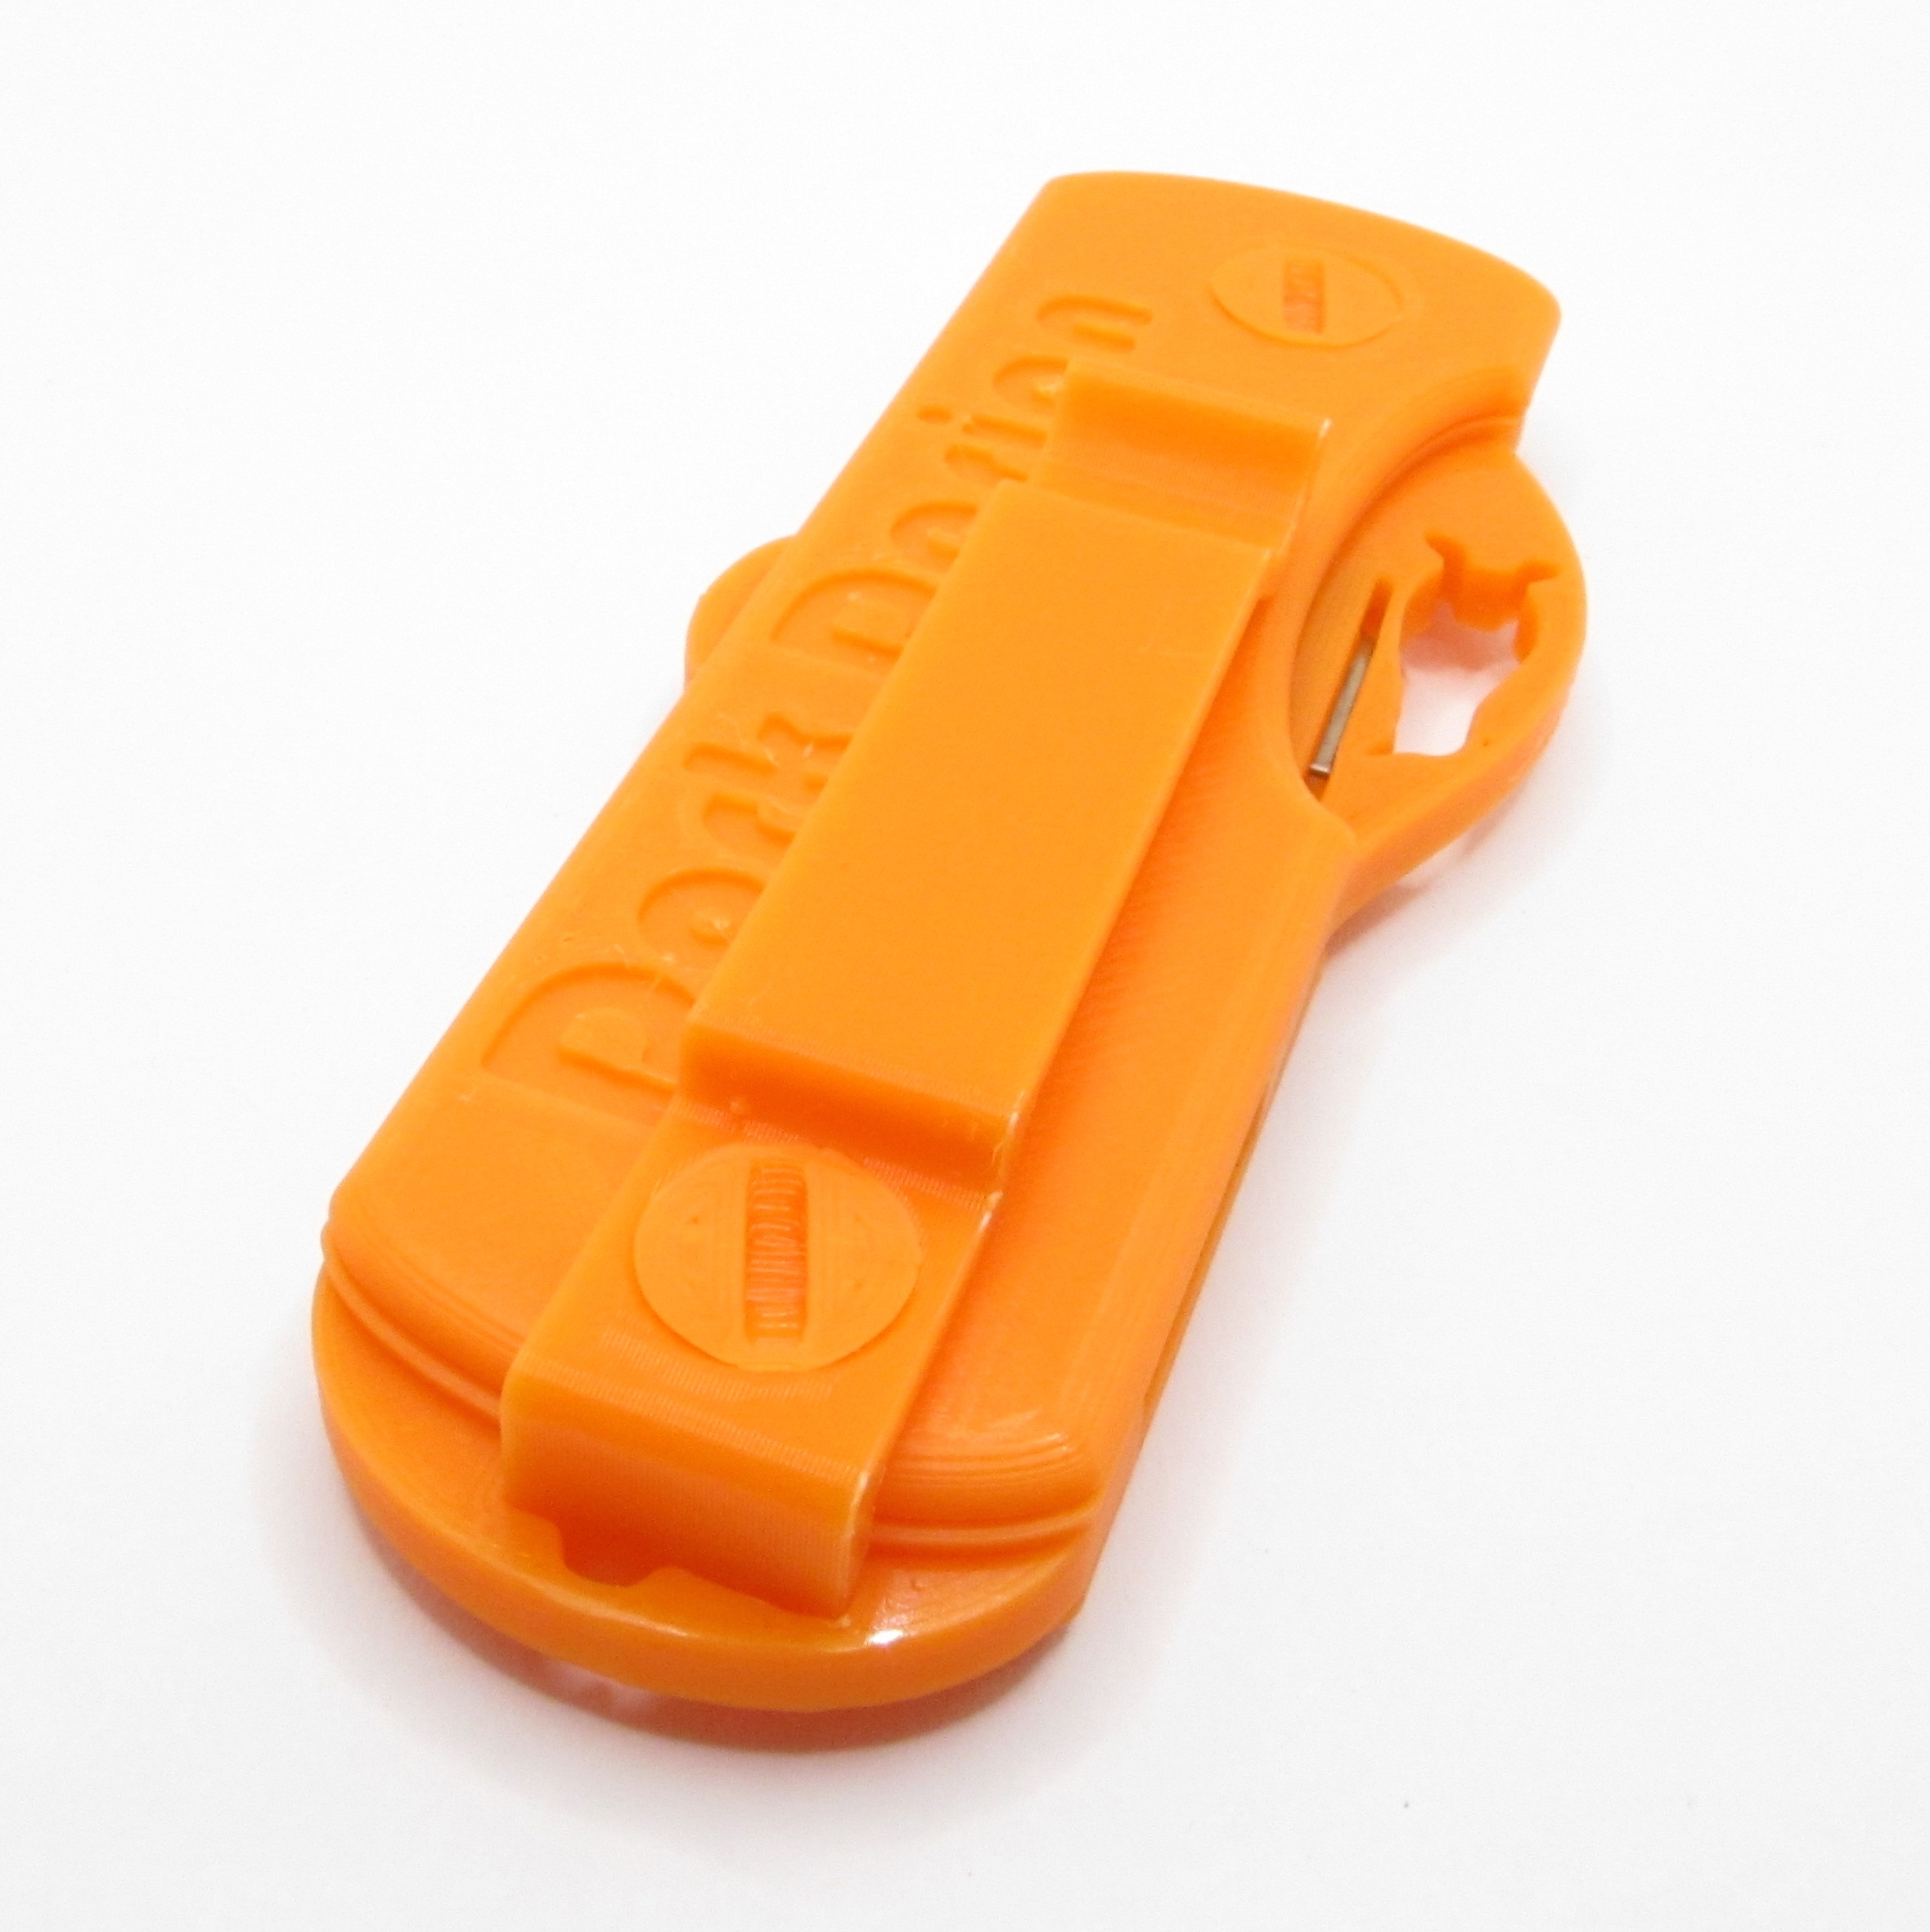
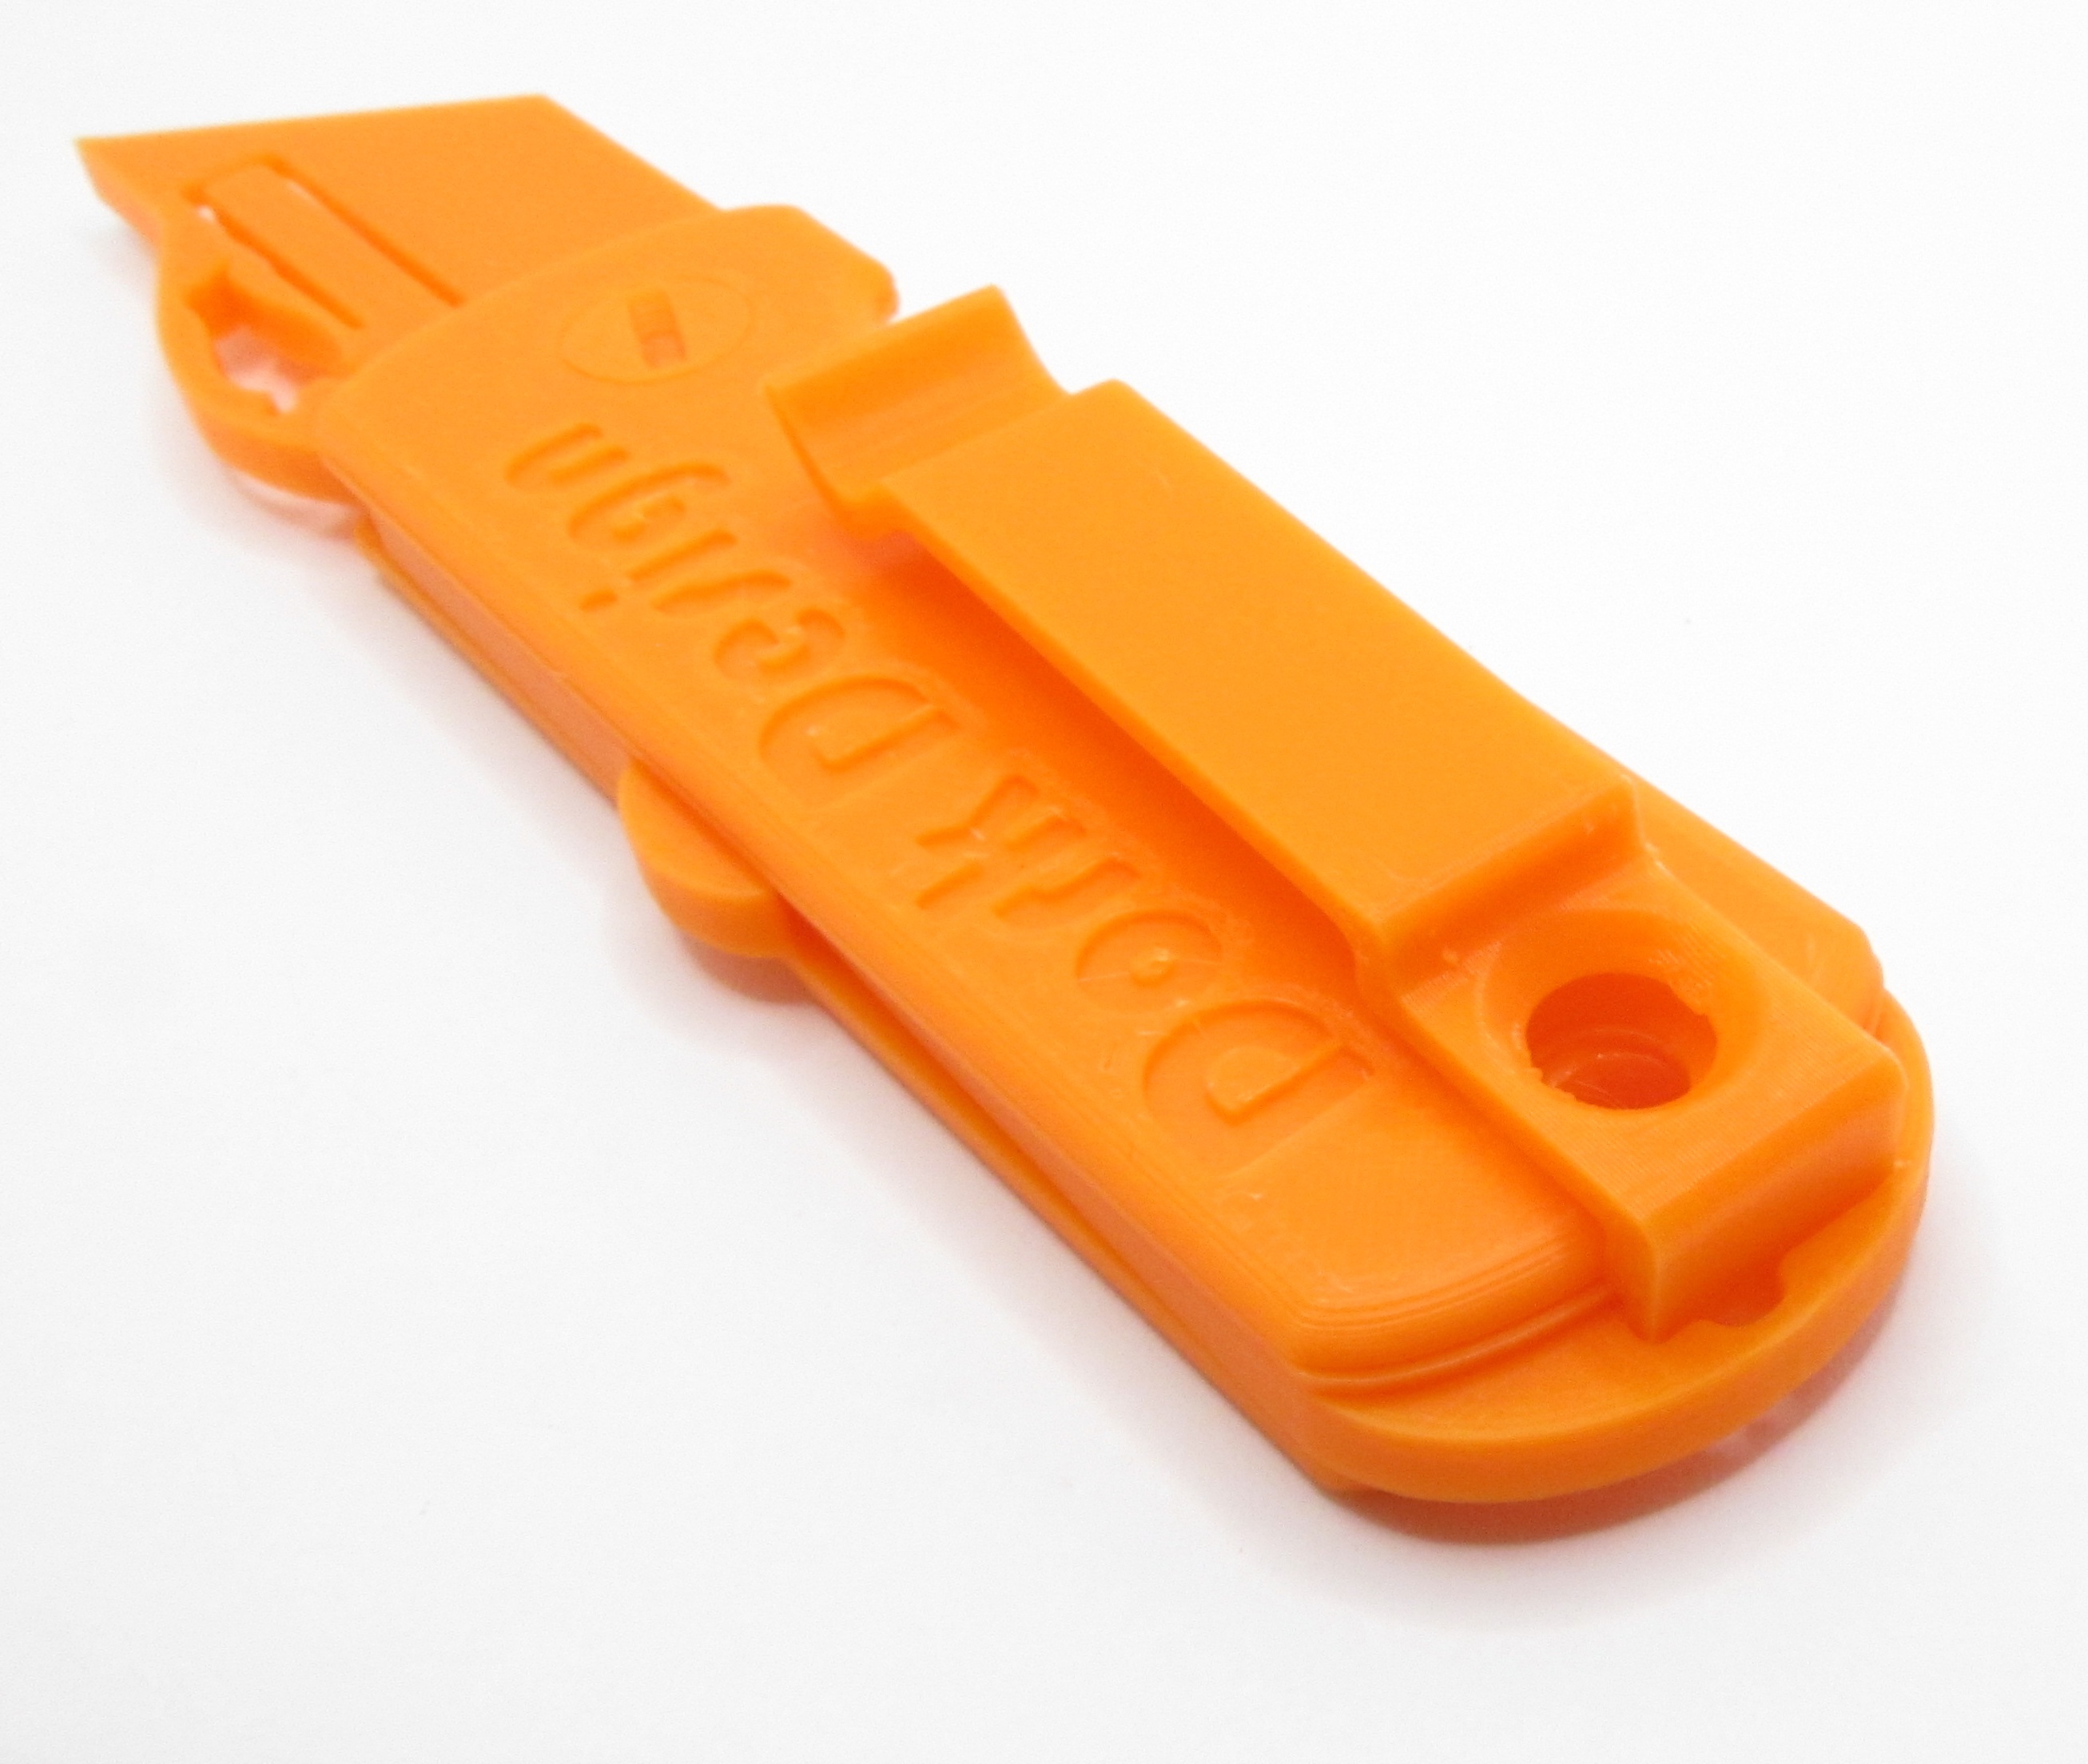
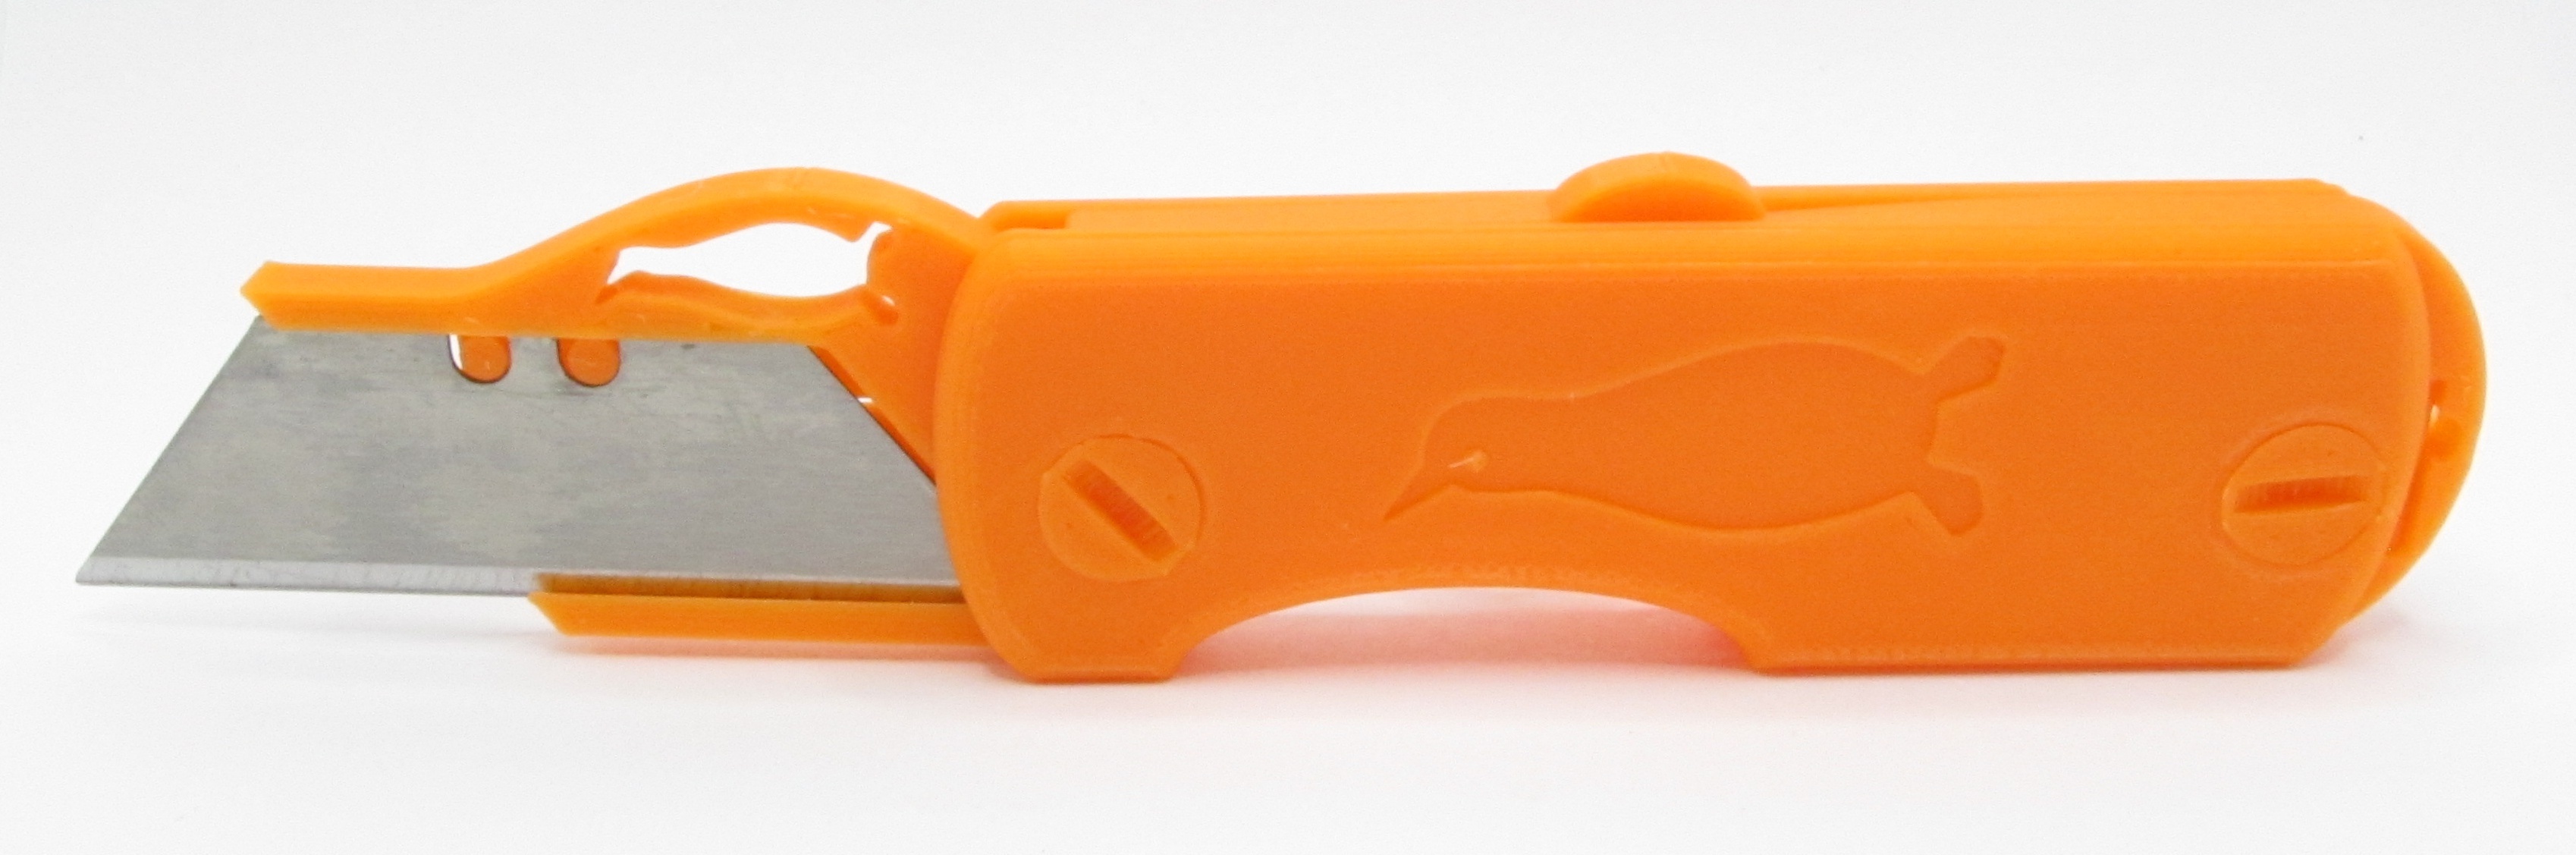
Here’s a slightly more practical printable than the last one, which I’m calling the Sparrow.
This knife has the same design goals as before: Fully printable, with no external hardware except the Stanley utility knife blade, no supports, and mechanically as close to a real functional mechanism as is possible.
So it’s a real working lockback folder. It locks up pretty good, too. Getting that working was one of those things that sounded really simple conceptually but actually turned out to be a pain in the ass to achieve. The mechanism owes a bit of credit to the Secret Of Show Business, via the wooden Spyderco kit we looked at a while back.
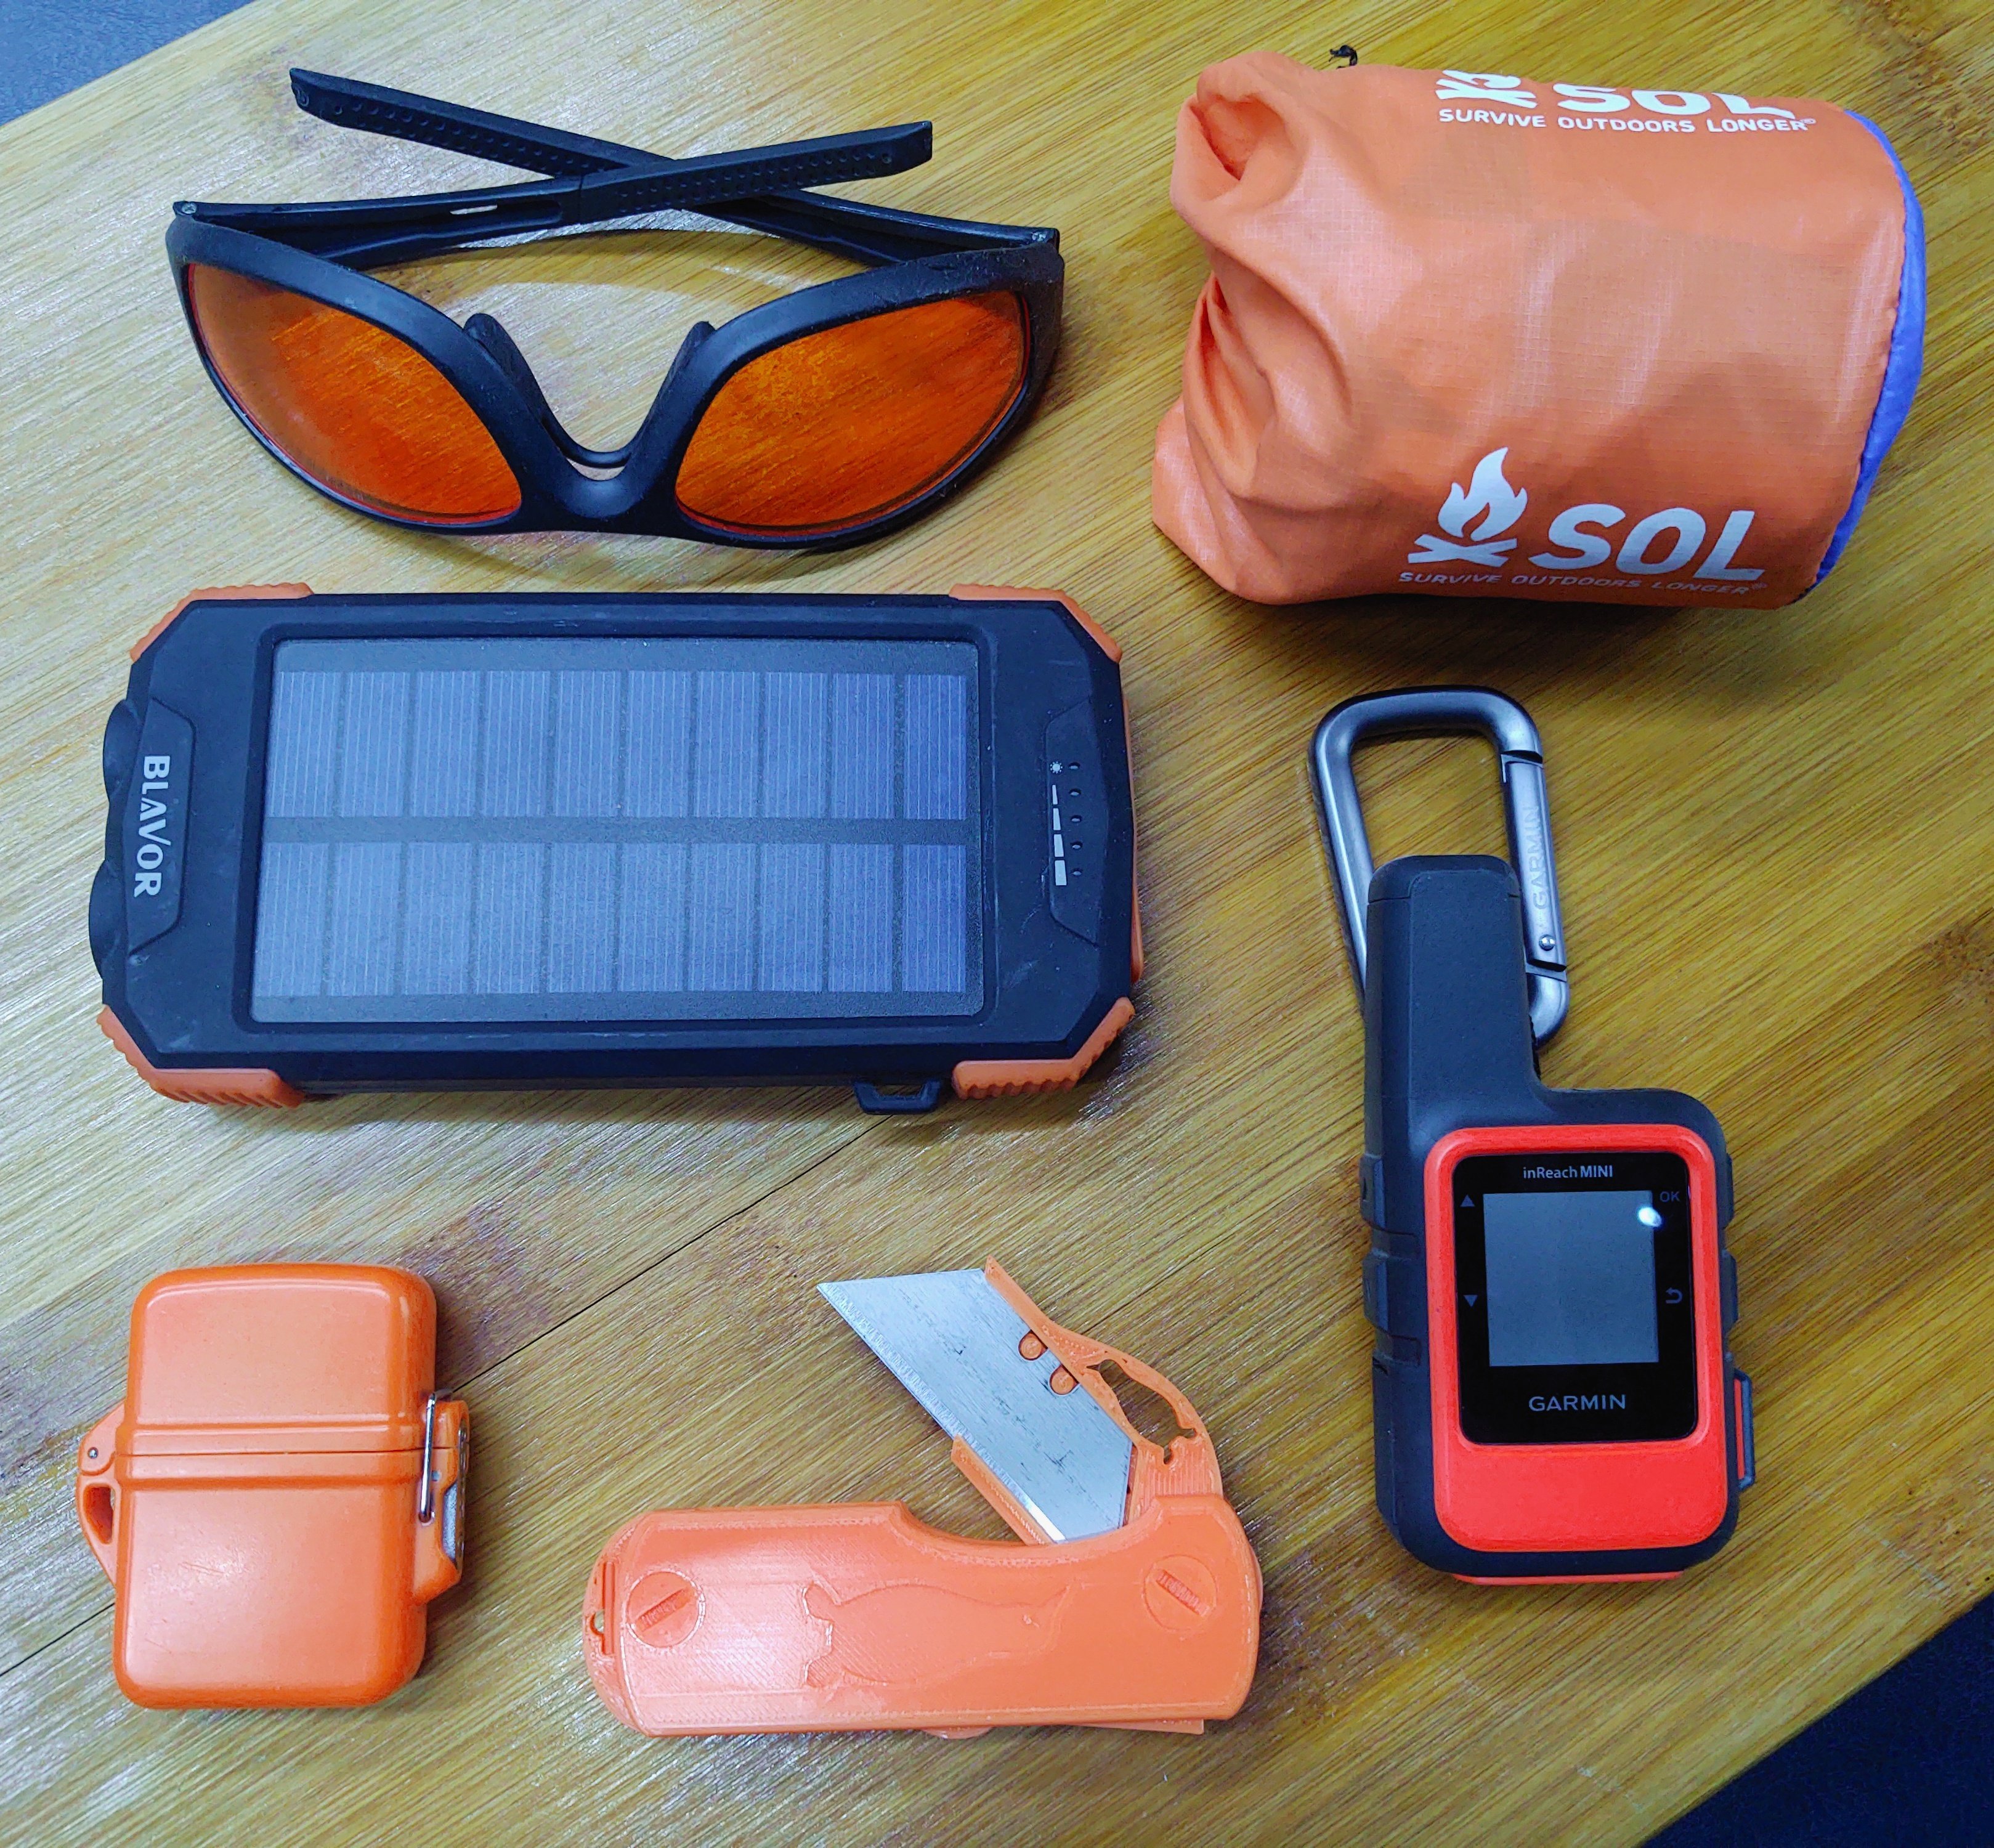
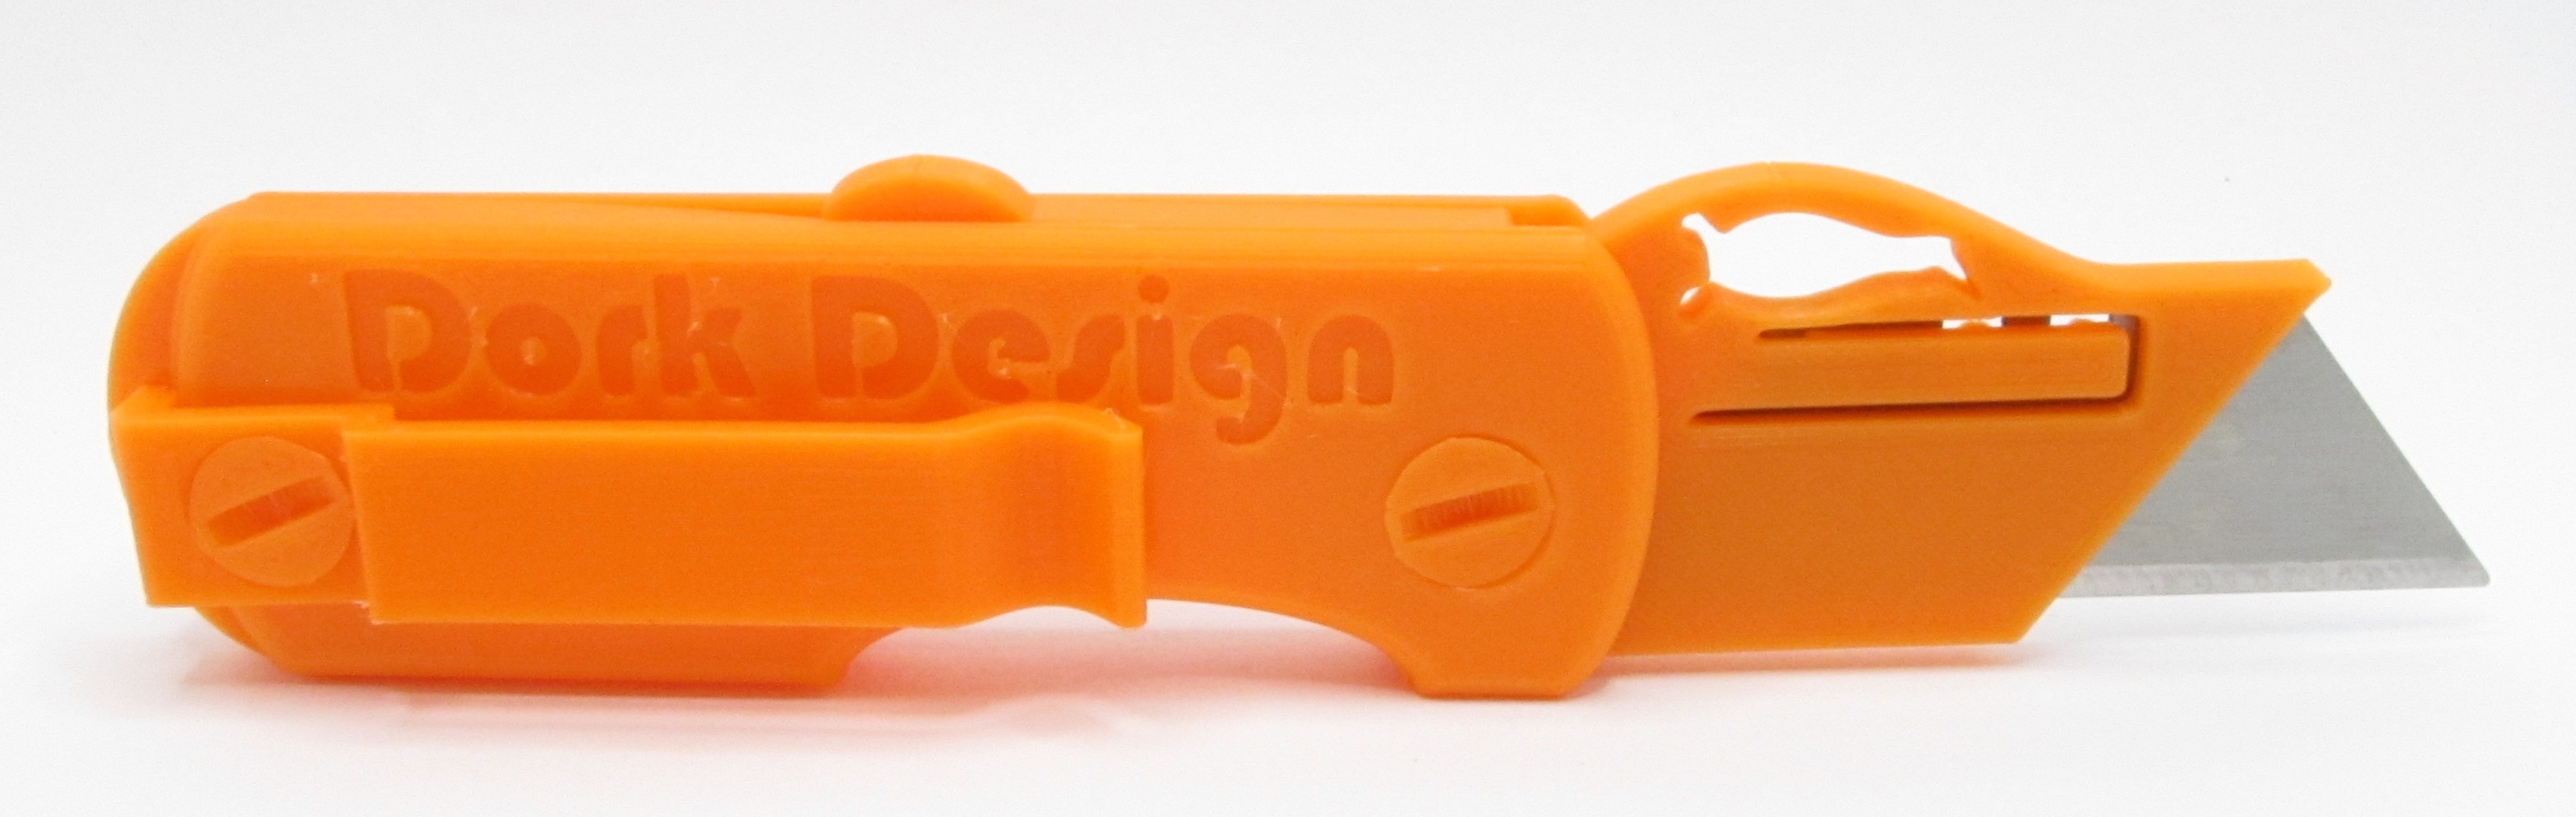
Oh, and making it in orange gives the the opportunity to do one of them there themed gear flat-lays that are so popular with the influencers nowadays.
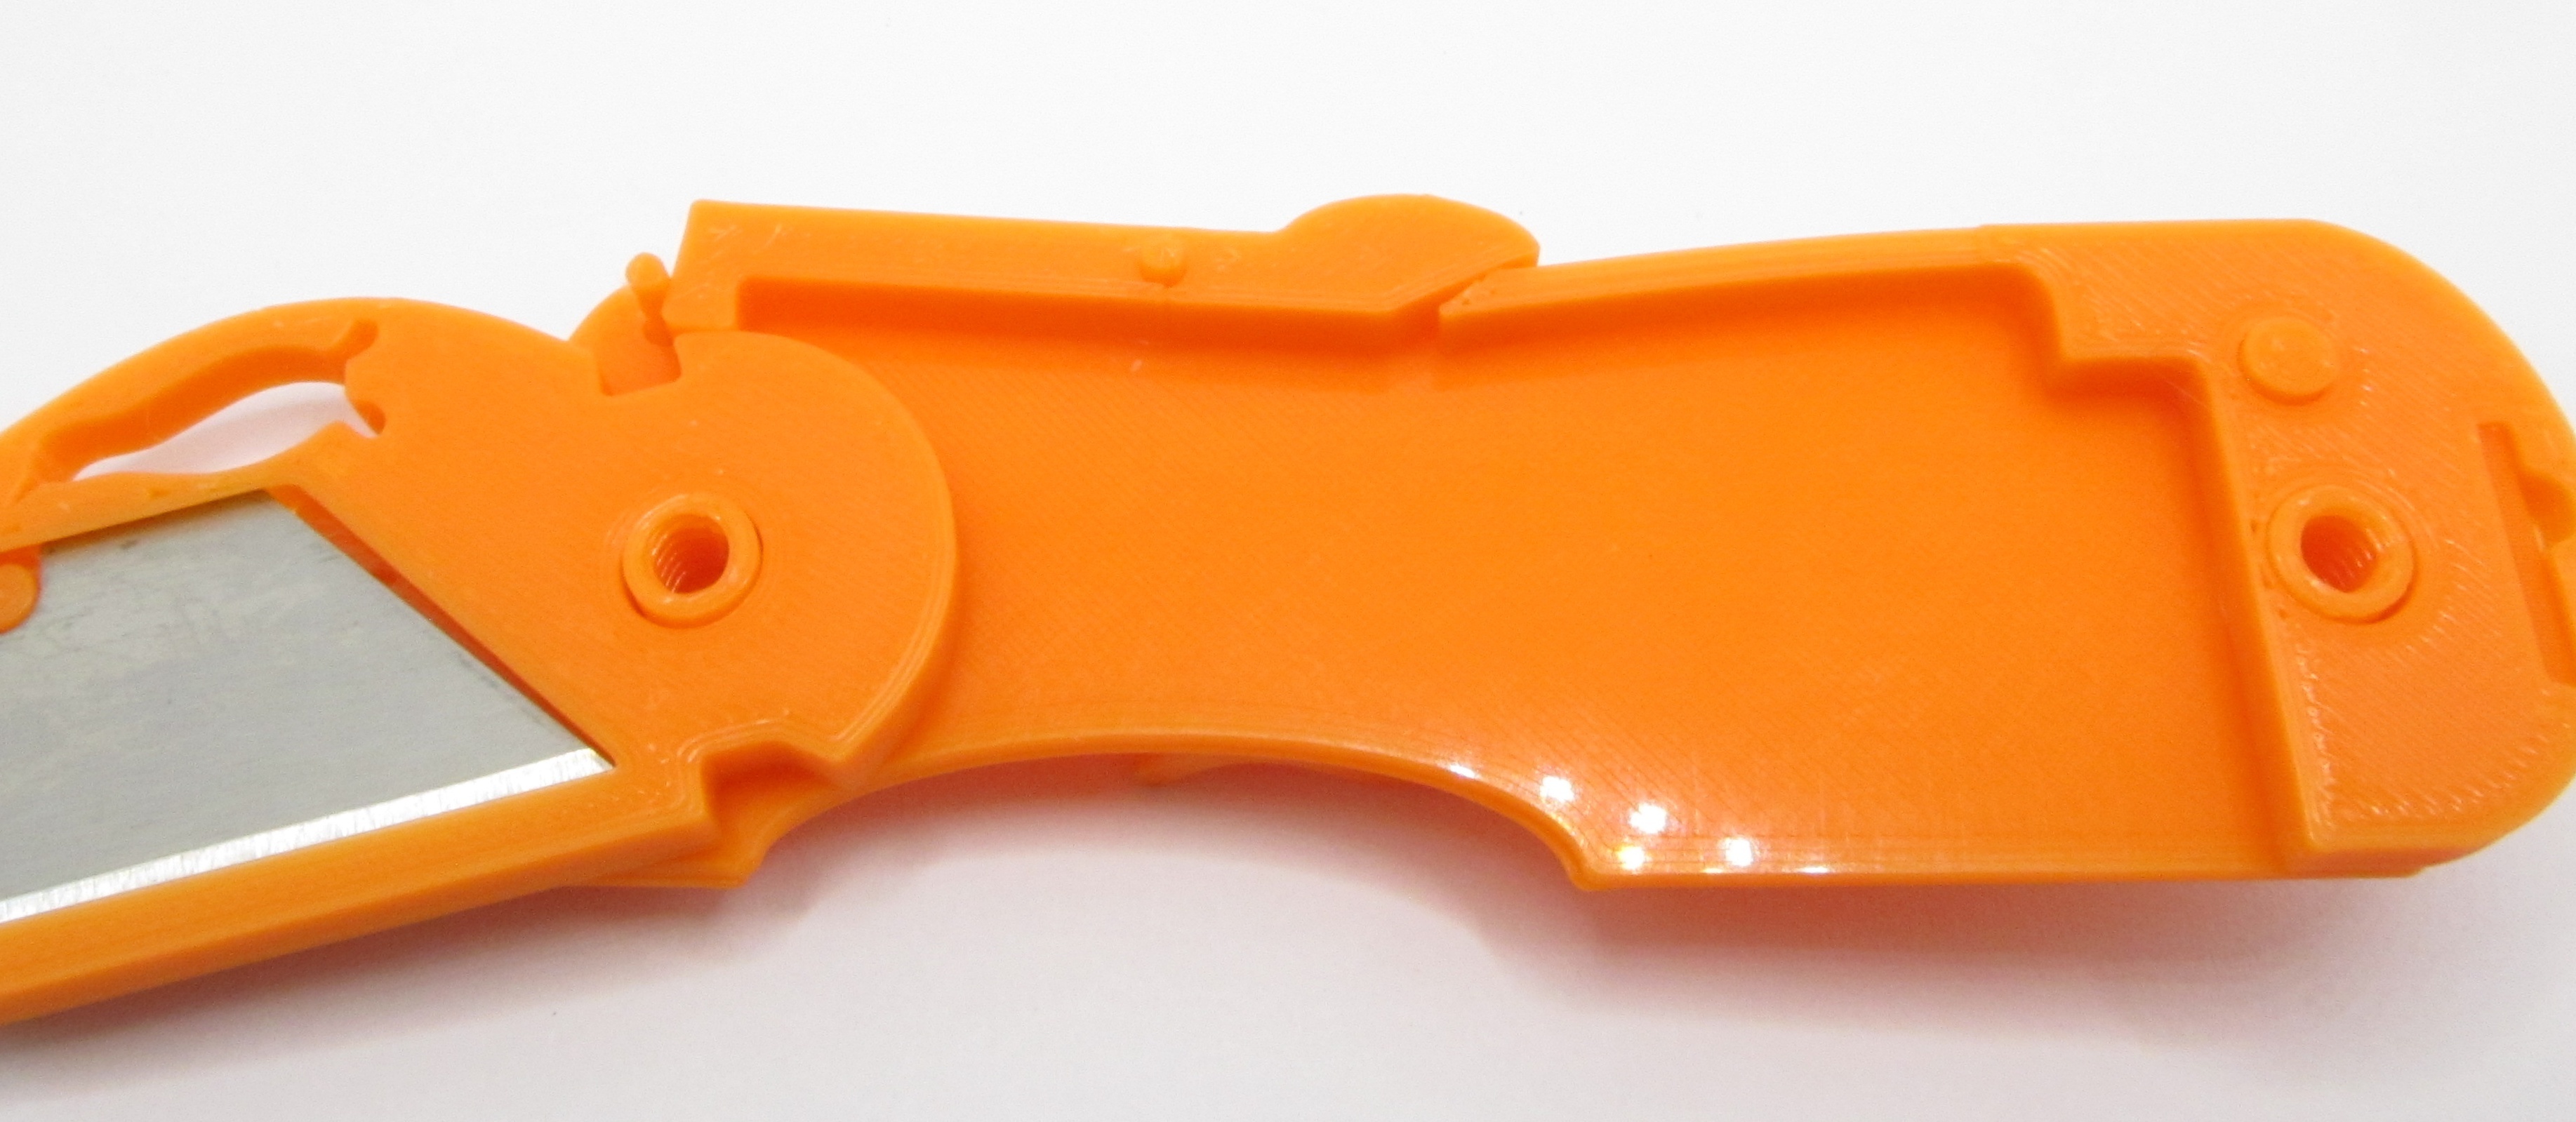
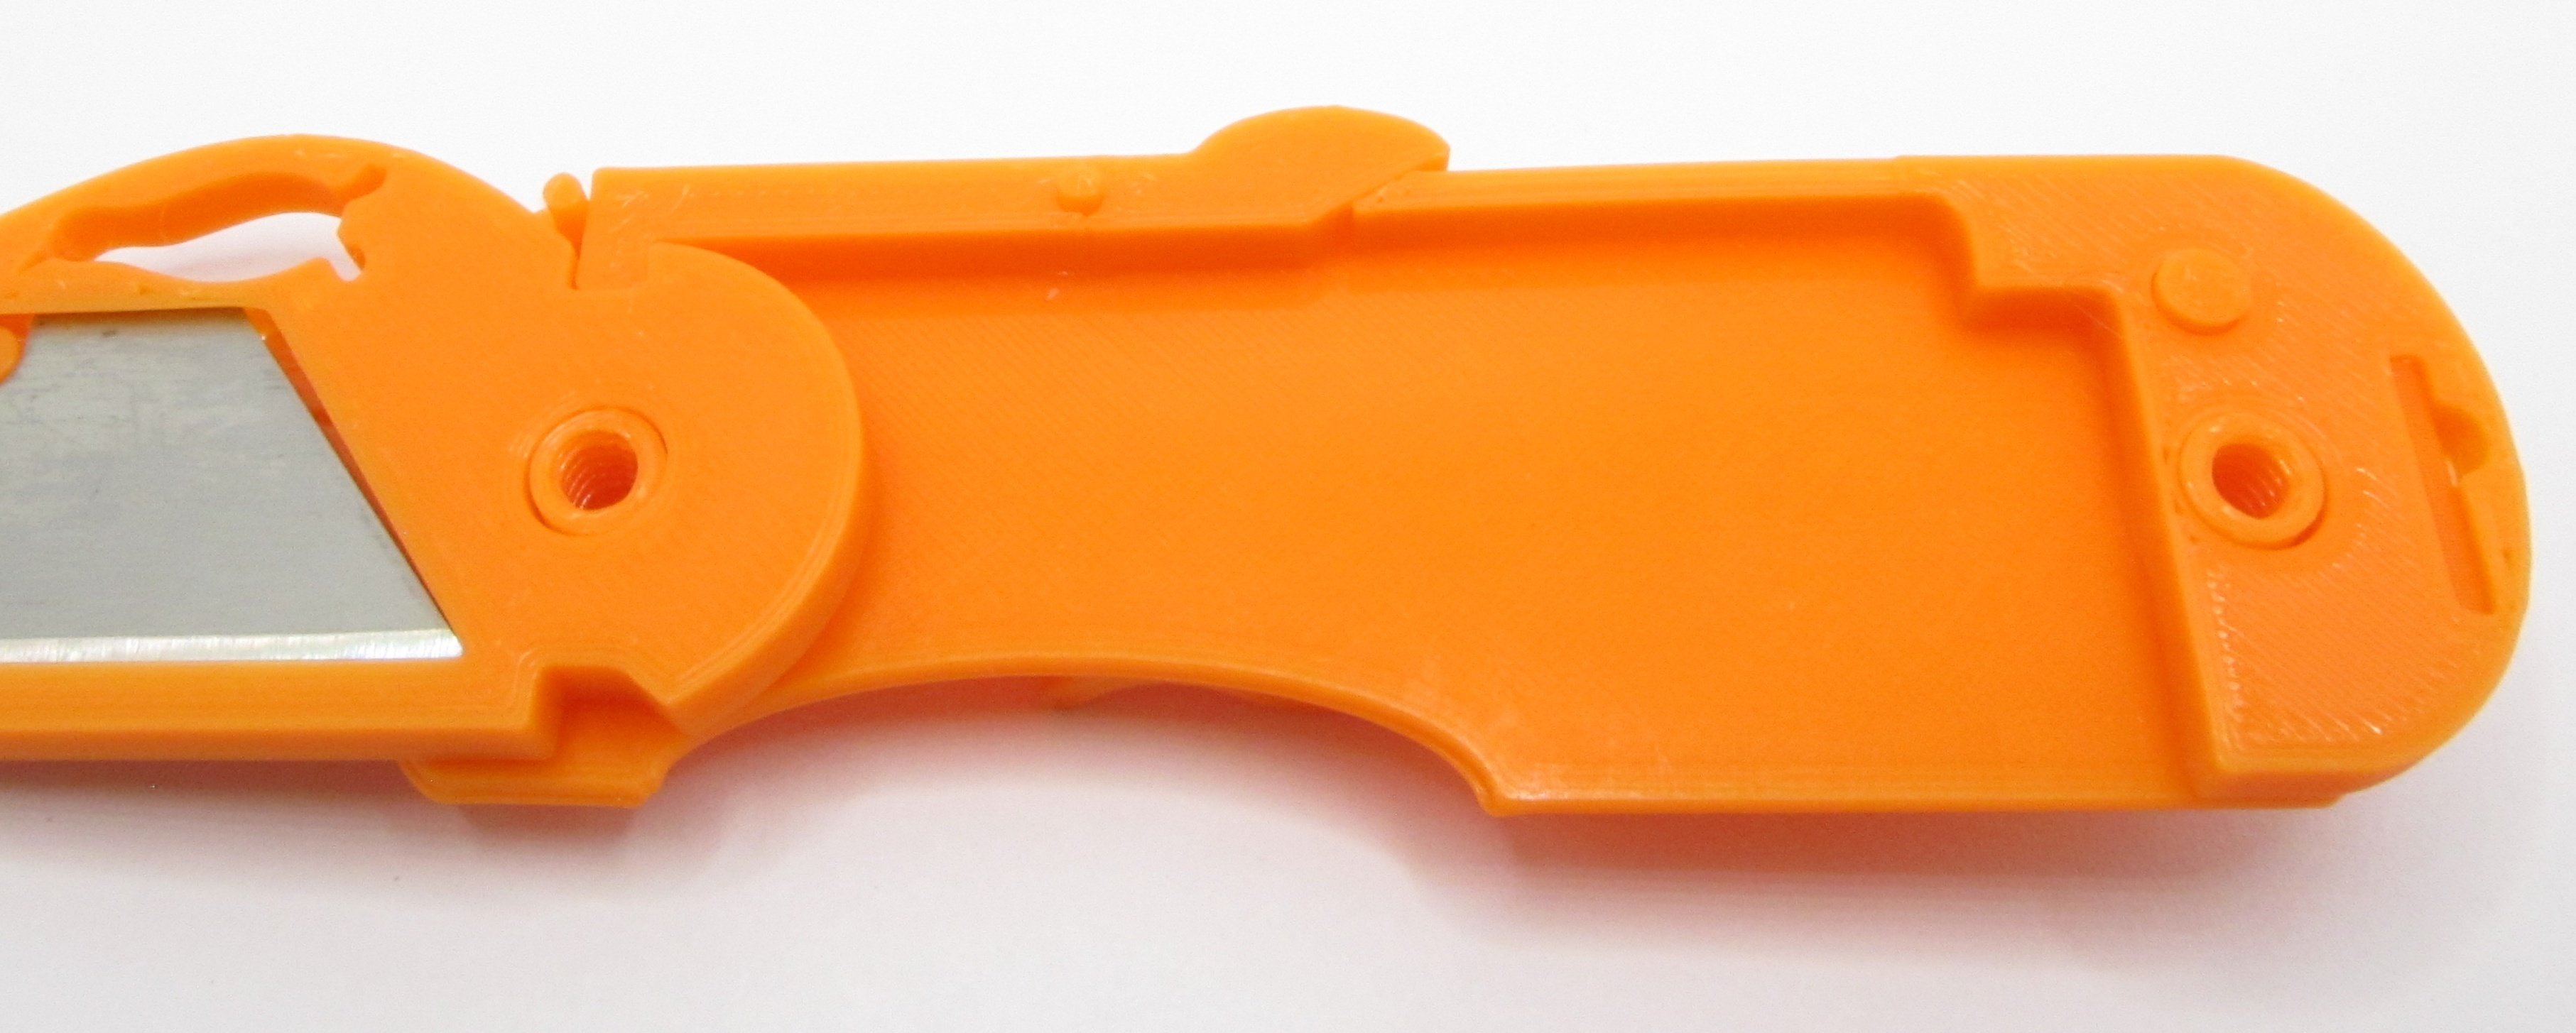
The Sparrow is a pretty pocketable EDC size at about 3-5/8" long when closed. It’s noticeably shorter than my CQC-6K, but it’s longer than a Gerber EAB because I can’t cheat and use smaller diameter steel screws. A noticeable portion of its length at the tail end is just to accommodate the printed screw, which I can’t make much thinner if I’d like it to continue to, you know, work.

Of course, it has a reversible pocket clip available as well.
Sure, it’s not as much fun to fiddle around with as a balisong knife. But I find the simple folding design a lot more practical for daily use. (I’ve been beating the shit out of my prototype, as is tradition, for a whole week at work before considering it “done.”) Plus it’s much less likely to draw the ire of the local constabulary if you happen to live in one of those countries with an unfortunate deficiency of bald eagles.
▓▓▓▓▓▓▓▓▓▓▓▓▓▓▓▓▓▓▓▓▓▓▓▓▓▓▓▓▓▓▓▓▓▓▓▓▓▓▓▓
Preemptive Burning Questions That Would Otherwise Inevitably Appear In The Comments
Q: Why are all the screws and pins separate parts? Don’t you know you could simplify the design by making it all one solid lump?
Of course I know that. However, let’s say you manage to break one of those titchy little 2mm pins. Would you rather re-print the entire monolithic handle liner assembly, or one 0.3 gram pin?
Q: But also making the handle scales separate was still totally pointless, right?
Sure, except this allows me to make a variety of scale styles available, including zooty skeletonized ones you can print in a complimentary color for two-tone aesthetics:
The possibilities practically suggest themselves.
Q: This is going to break instantly and you’ll slice your fingers off. Printing something like this is so unsafe! I know this because I have done no math or testing whatsoever, but am an armchair expert!
Well, I clamped my prototype knife in my vise and yanked on it against its opening axis with a dial scale until it broke. You know, for science.
The major markings on that scale are 5 pound increments, by the way. It gave a noticeable warning creak at 37 pounds, and finally broke with the dial indicating 39 pounds. It was only made out of ordinary PLA. As you can see, I actually had to adjust my grip and I was bracing my foot against the bottom of my workbench to be able to put enough oomph into it to break it. If you torque your box cutter at nearly 40 pounds in day-to-day use I suggest you’re probably using it wrong. Provided you don’t try to use this knife as a crowbar or a piton I really don’t think you’ll have anything to worry about.
Q: What’s with the dumb bird on everything?
He’s a penguin. Don’t be dissing my penguin, man.
▓▓▓▓▓▓▓▓▓▓▓▓▓▓▓▓▓▓▓▓▓▓▓▓▓▓▓▓▓▓▓▓▓▓▓▓▓▓▓▓
.STL Files Download: Here.
As before, the above is provided as-is and with no guarantees, and you are free to make your own or give printed knives away to friends or family or what have you, but prints of my models are not to be sold and not to be uploaded or reposted to any model repository or anywhere else outside of the Lemmy-sphere.
▓▓▓▓▓▓▓▓▓▓▓▓▓▓▓▓▓▓▓▓▓▓▓▓▓▓▓▓▓▓▓▓▓▓▓▓▓▓▓▓
Assembly Instructions and like a million pictures As Follows:
People with no interest in printing or assembling one of these can stop reading now. I promise I’ll go back to my usual program of loquacious show-and-tell/point-and-laugh over various whackmobile novelty knives in my subsequent posts.
Anyway, you will need to print this small mountain of components.
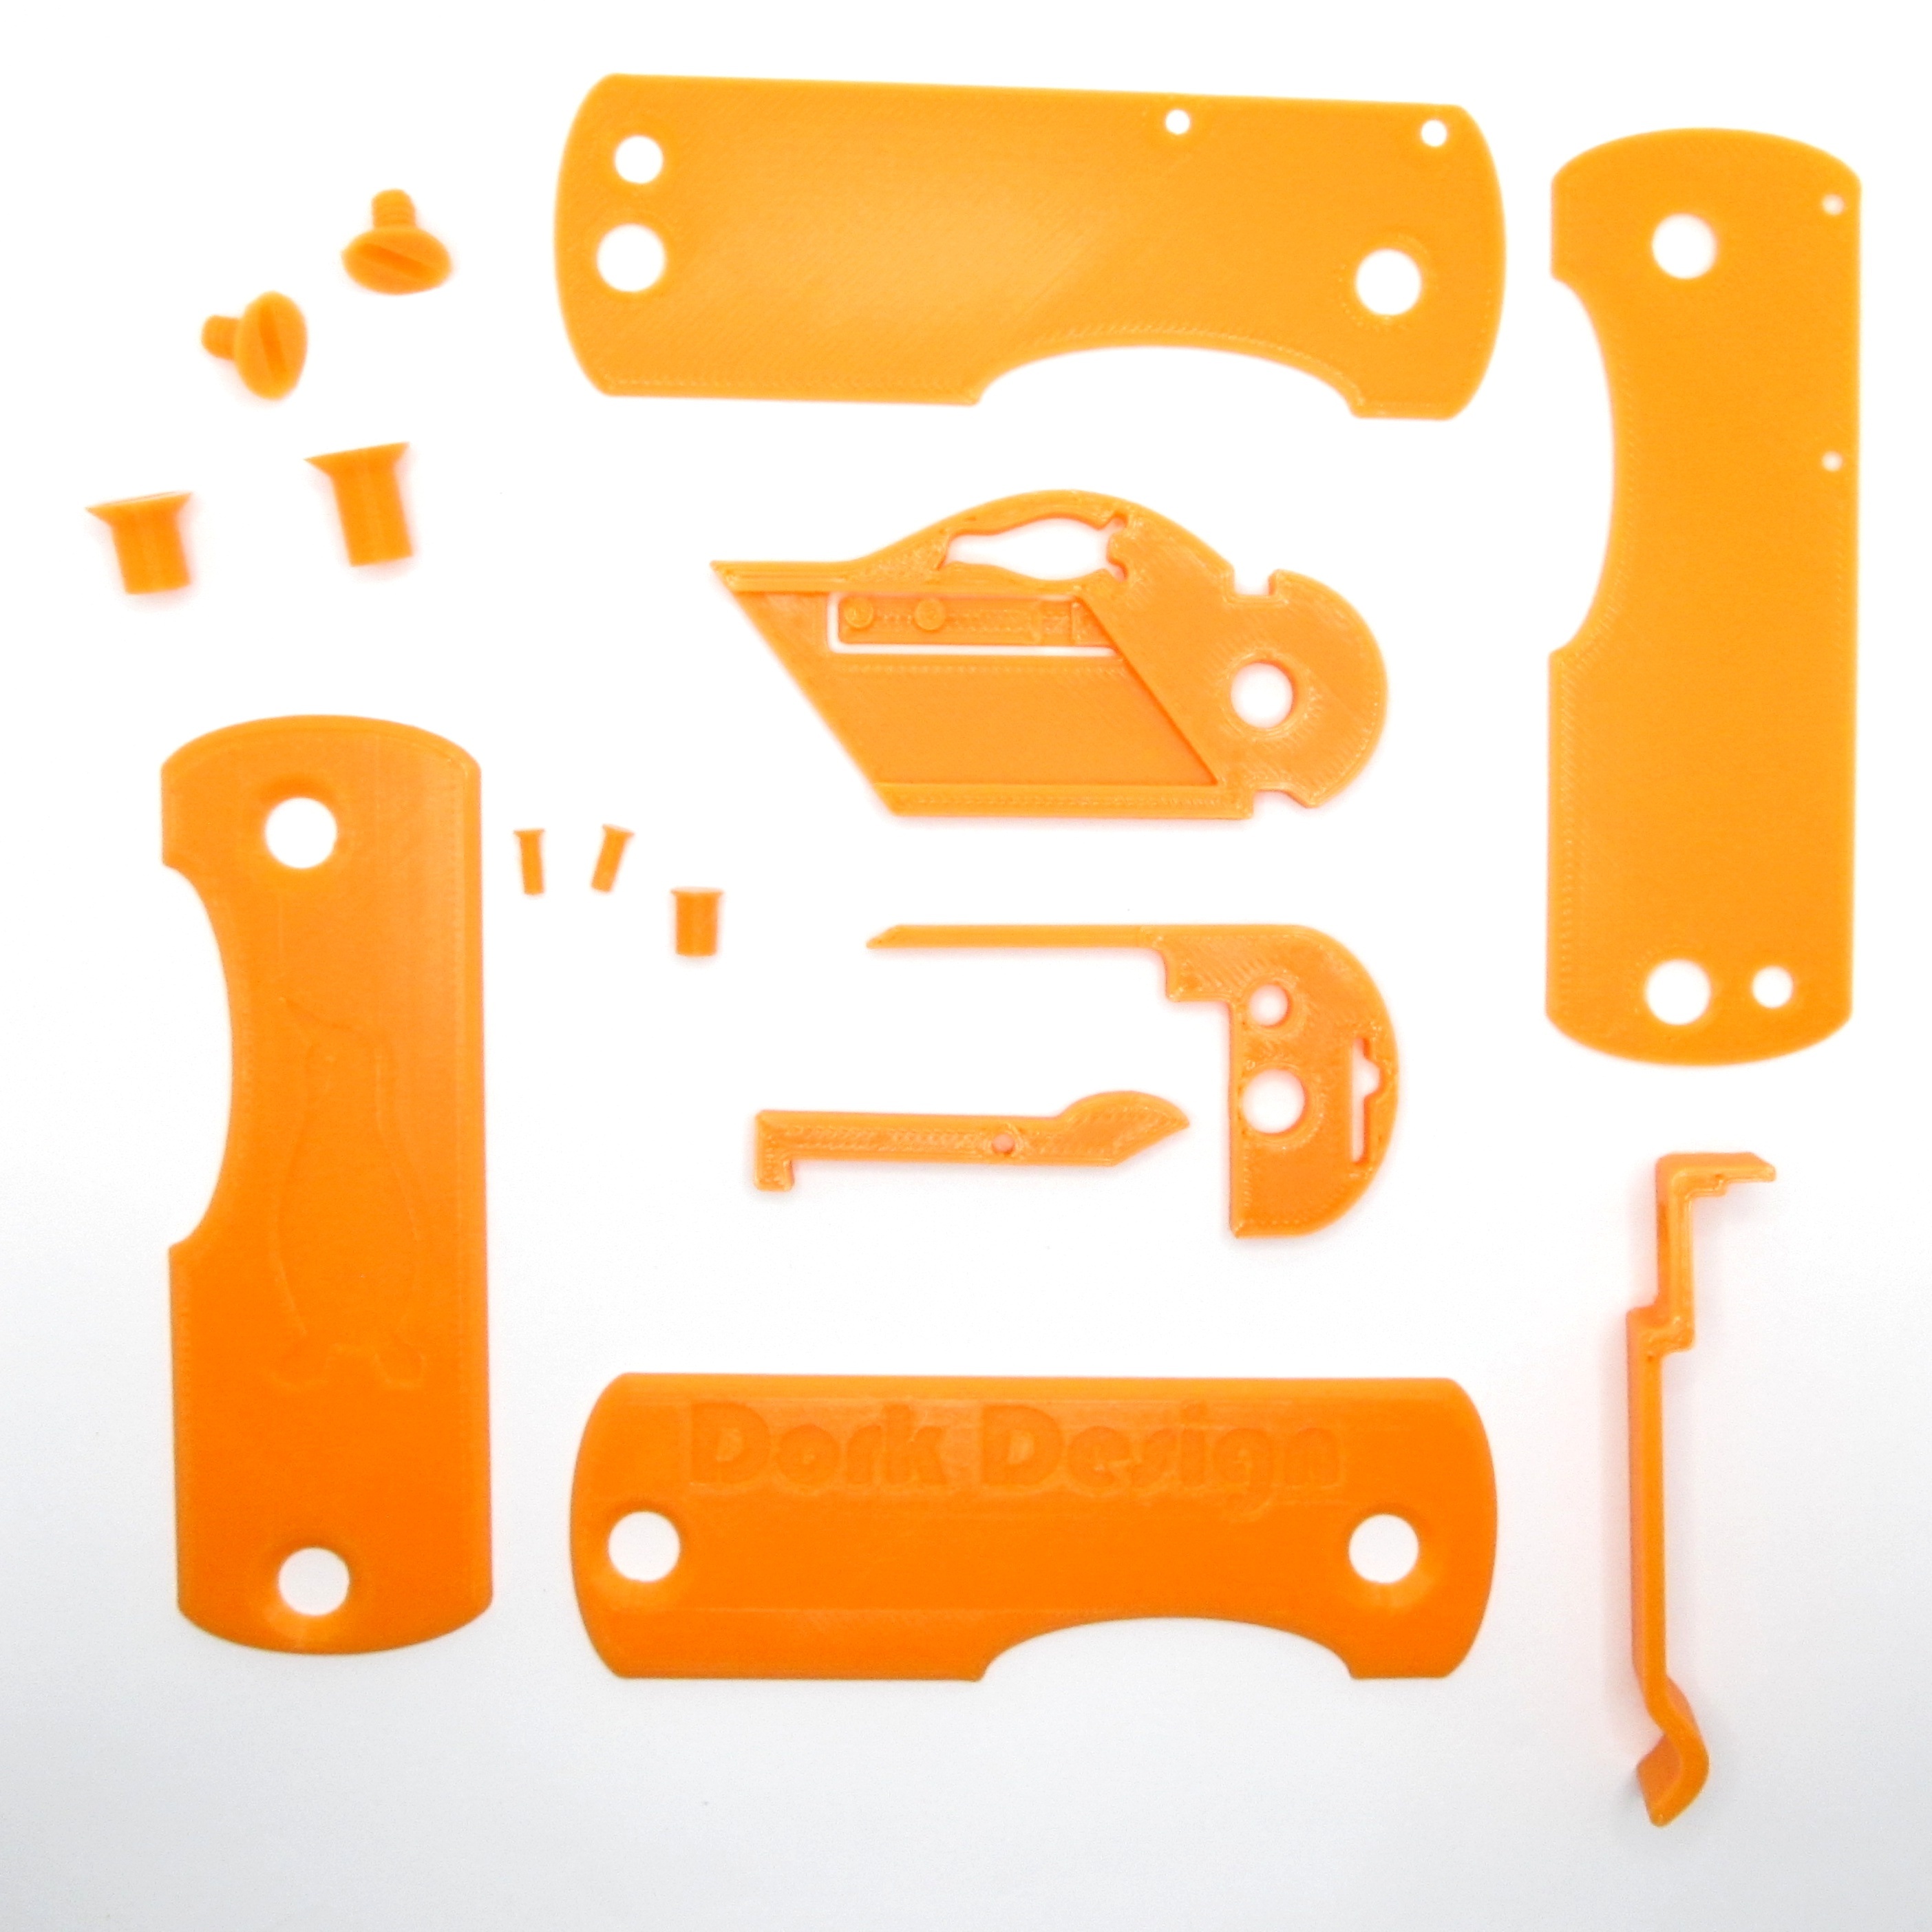
The complete bill of materials is as follows:
- 1x Blade Holder
- 1x Top Liner, 1x Bottom Liner
- 1x Lock Bar
- 1x Spring Block
- 2x Female Screws
- 2x Male Screws
- 2x 2mm Pins
- 1x 4mm Pin
- 1x Top Scale, 1x Bottom Scale of your choice
- If you want to use the clip, you need 1x Pocket Clip, and replace 1x of the short female screws with the longer one included, labeled “for pocket clip.”
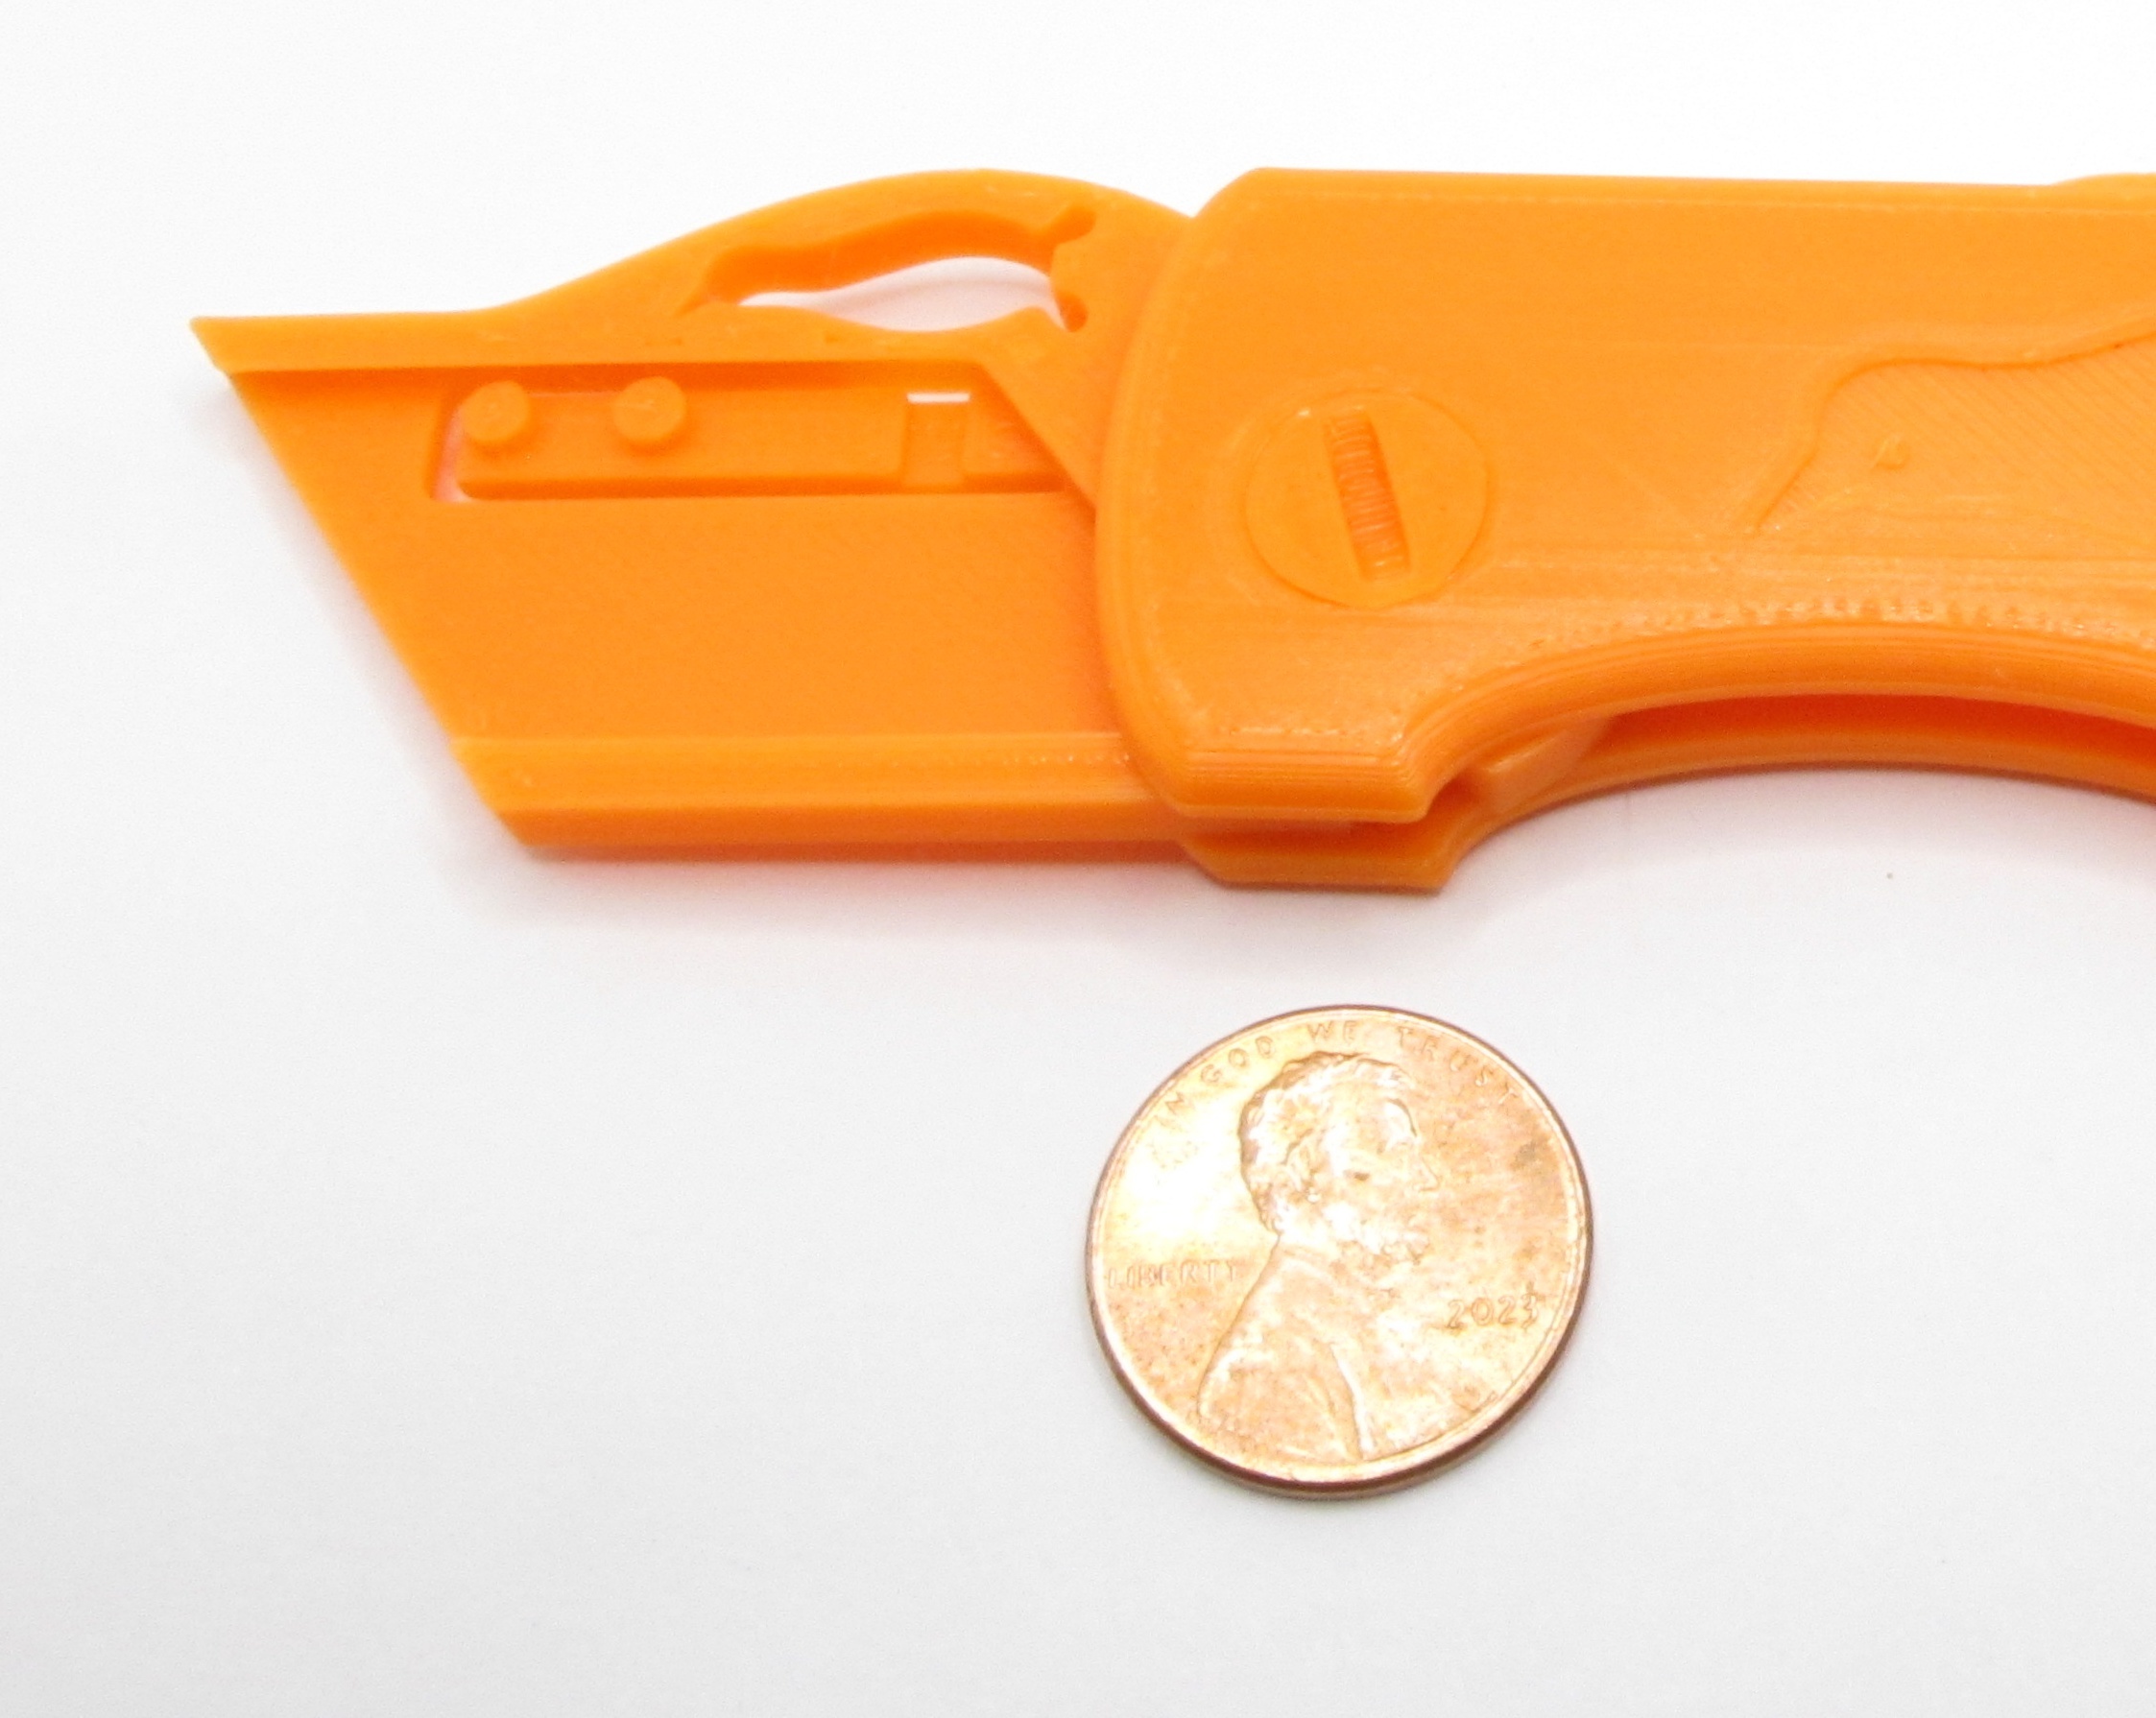
Several components are quite close fits, and various pins and screws need to fit through their respective holes. If your printer produces parts with a lot of elephant’s foot on the bottom you’ll probably have to trim the inside edges of the holes with a utility knife blade, which is something I should hope you’ll have to hand when embarking on this project…
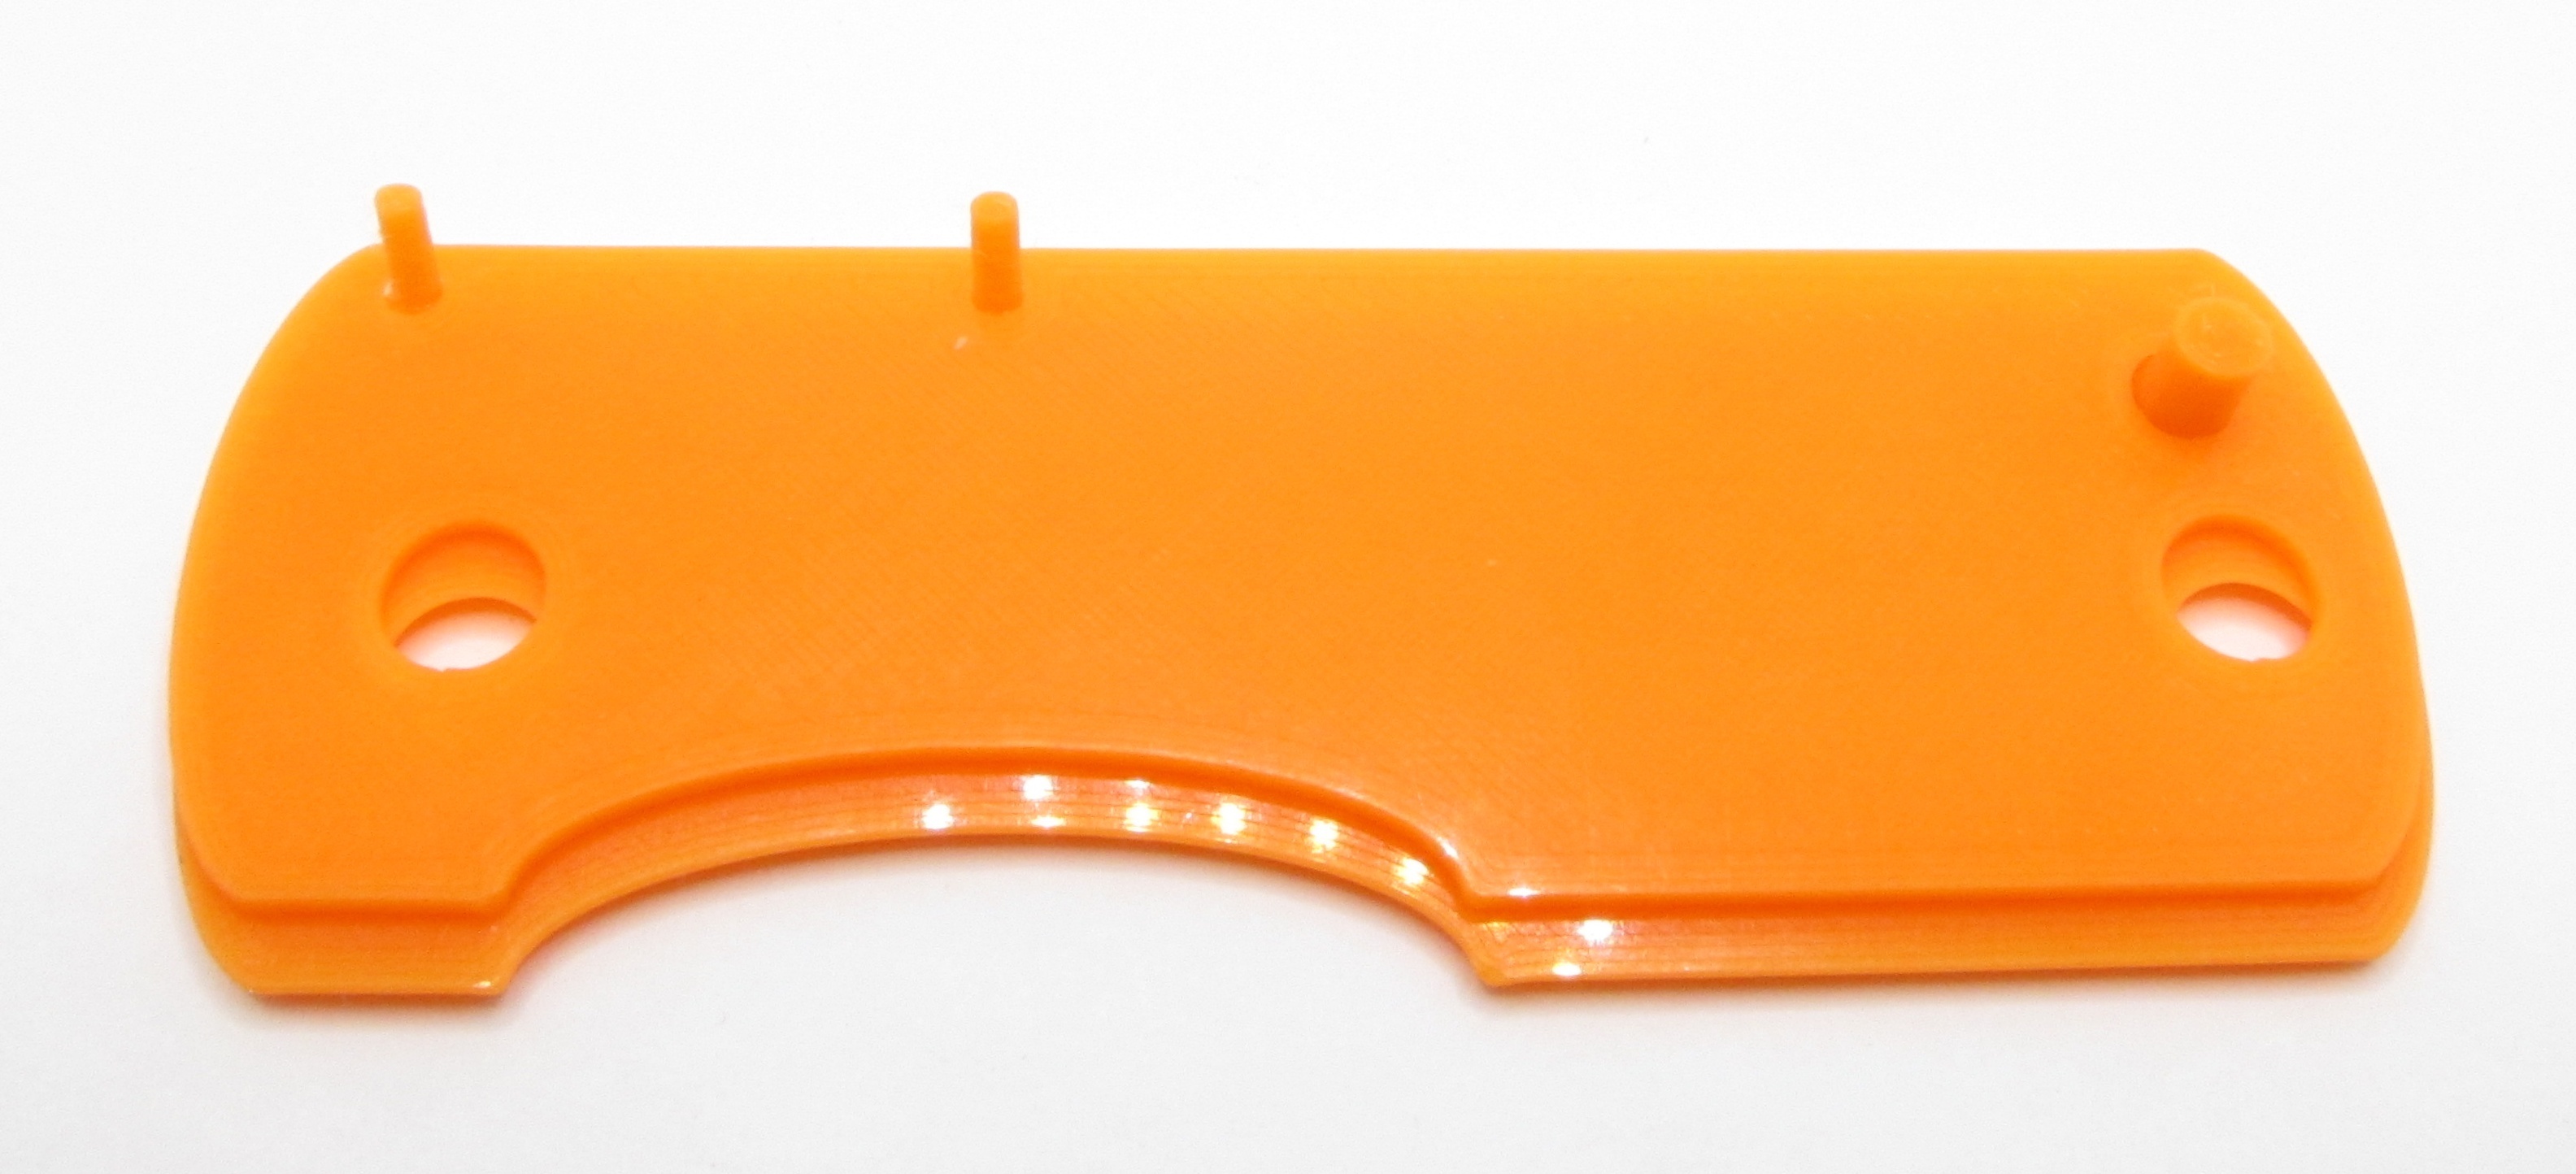
Start with the bottom liner. You can identify it as the one with the chamfered holes for the pins, which you’ll notice have flared heads.

Stick the 2mm pins and the 4mm pin through. They’ll sit flush with the underside of the liner. If they don’t, you have some trimming to do. Then sandwich your bottom handle scale underneath that. The scale will keep the pins from falling out.
Then identify your screws. There are two screw lengths, and if you’re going to use the pocket clip you’ll put the shorter one through the front where the blade goes on, and the longer one through the tail where the clip will go. If you’re not going to use the clip, just employ two short screws instead, one on either end.
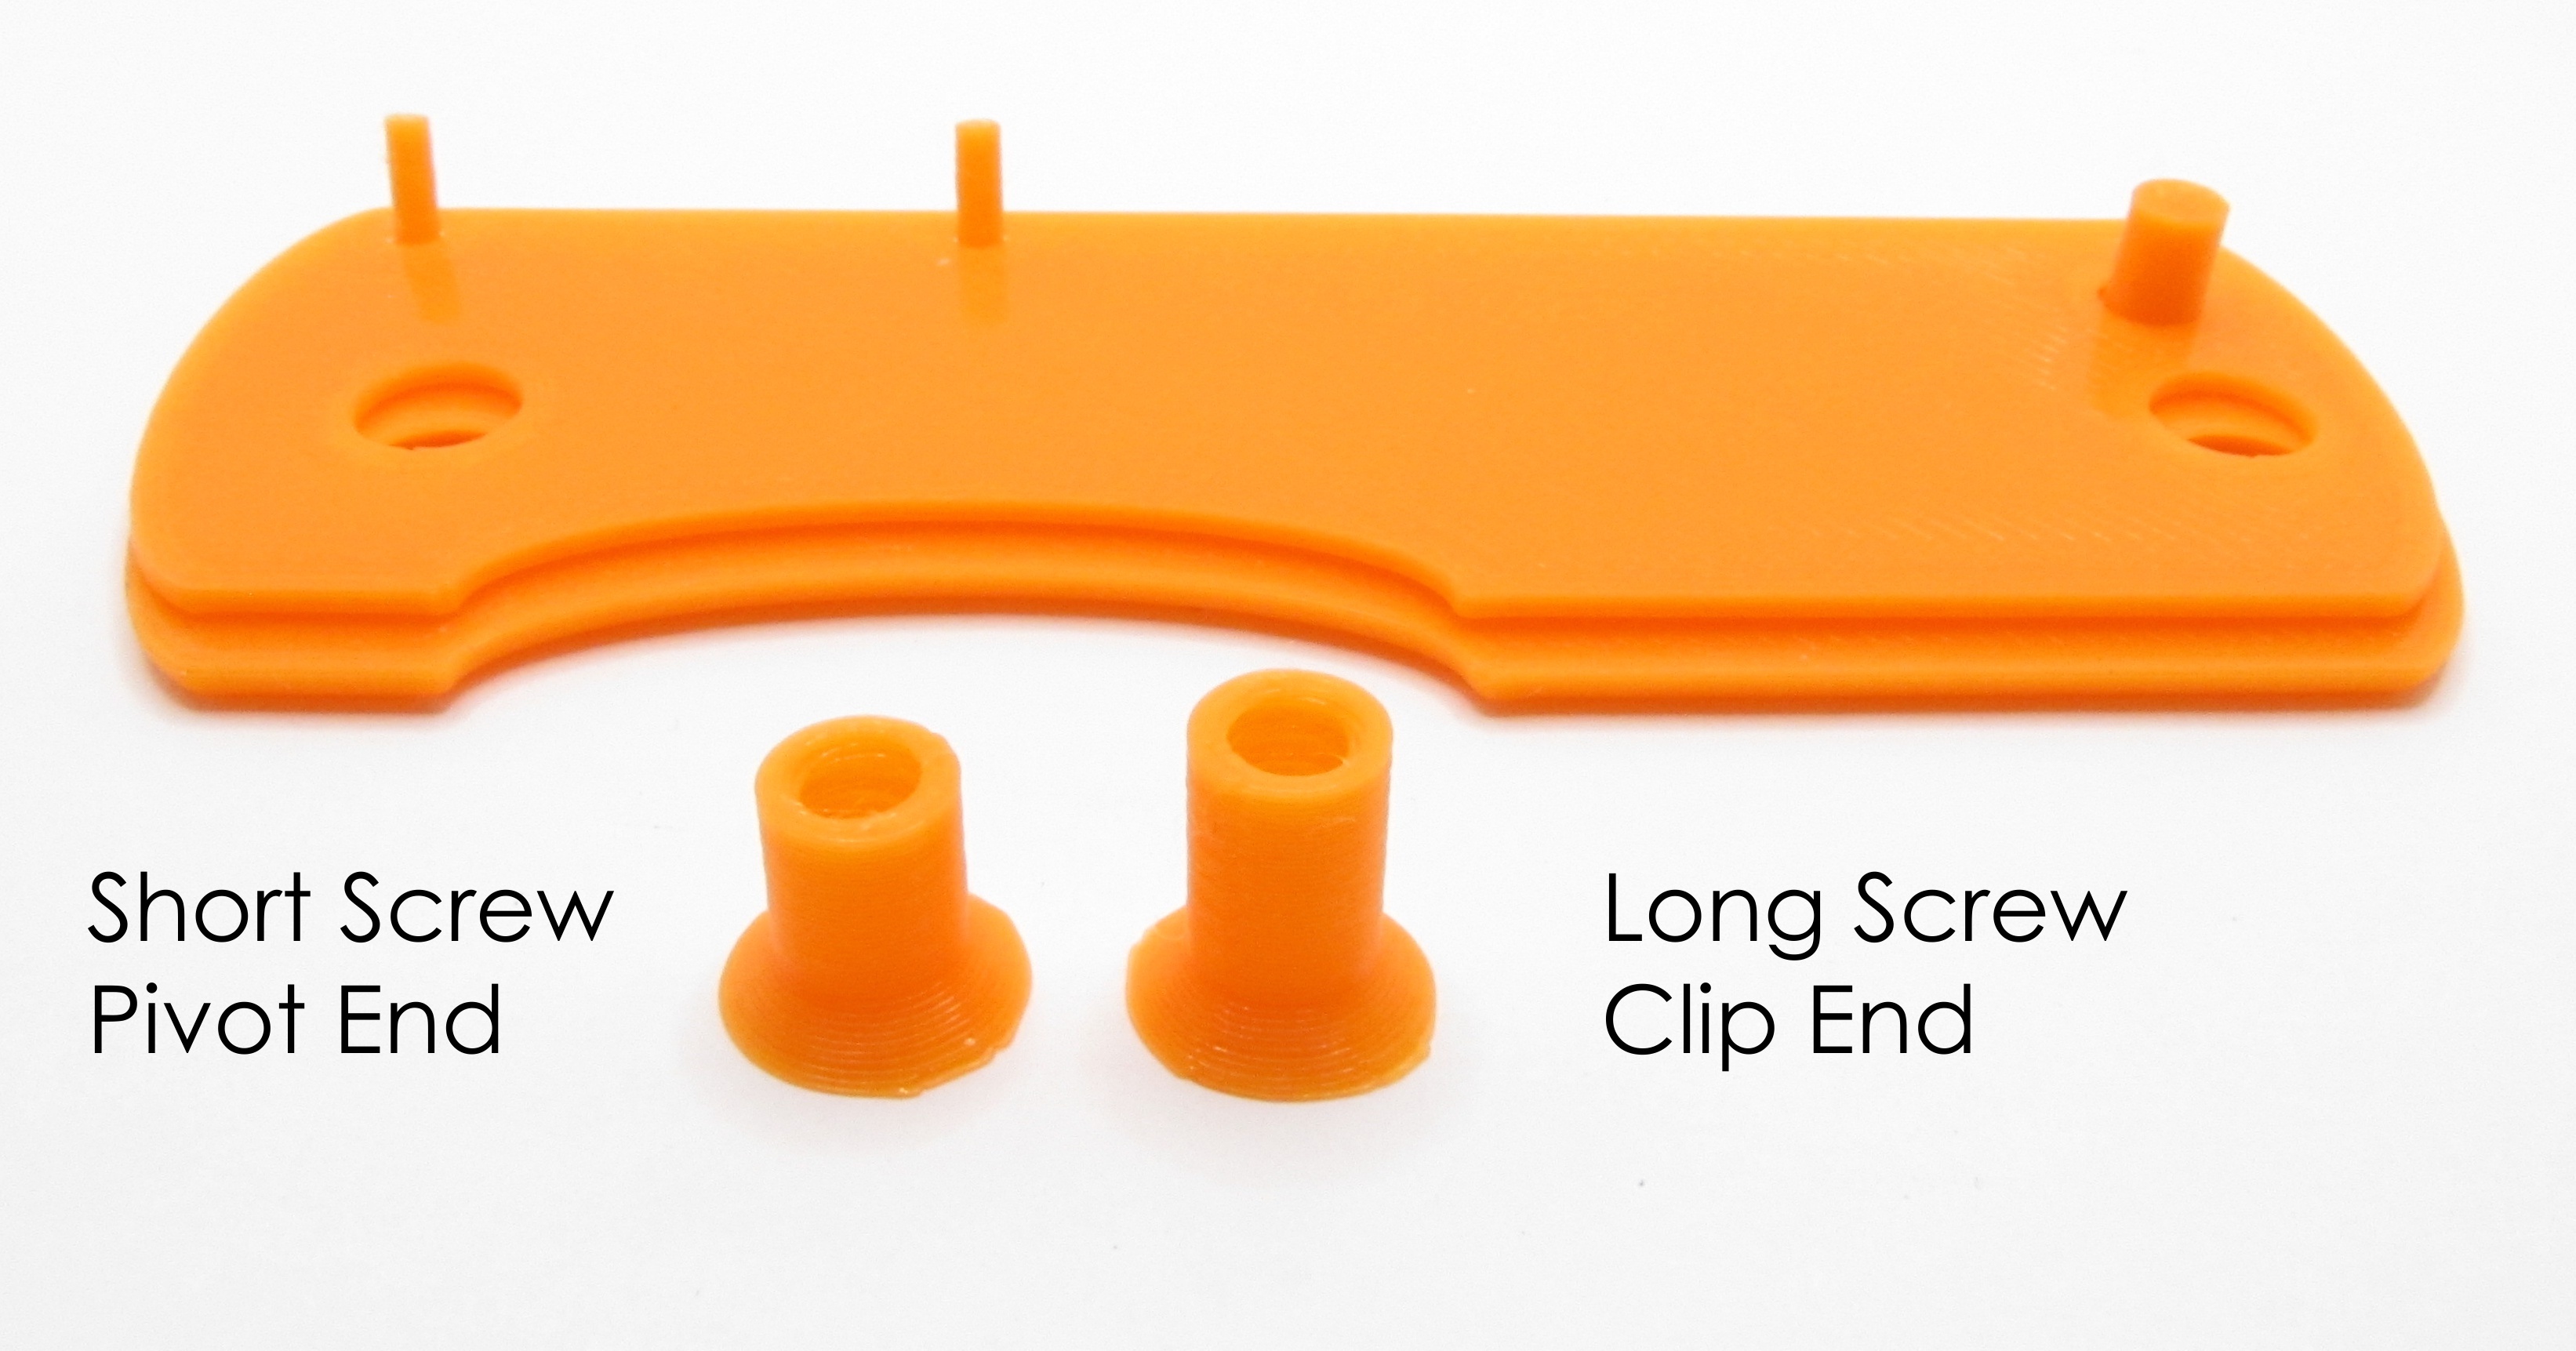
Either way, stick the female screws up through the entire sandwich.

Drop the blade holder on the front screw.

Then put the lock bar through the middle pin. Play with it a bit and make sure it drops cleanly into the notch on the blade holder. If anything is going to require tuning or sanding it’ll be the interface between the lock bar and its notch there. It should also pivot freely on its pin. If it’s a really tight draggy fit this will annoy you, and this’ll make the lockup unreliable as well.
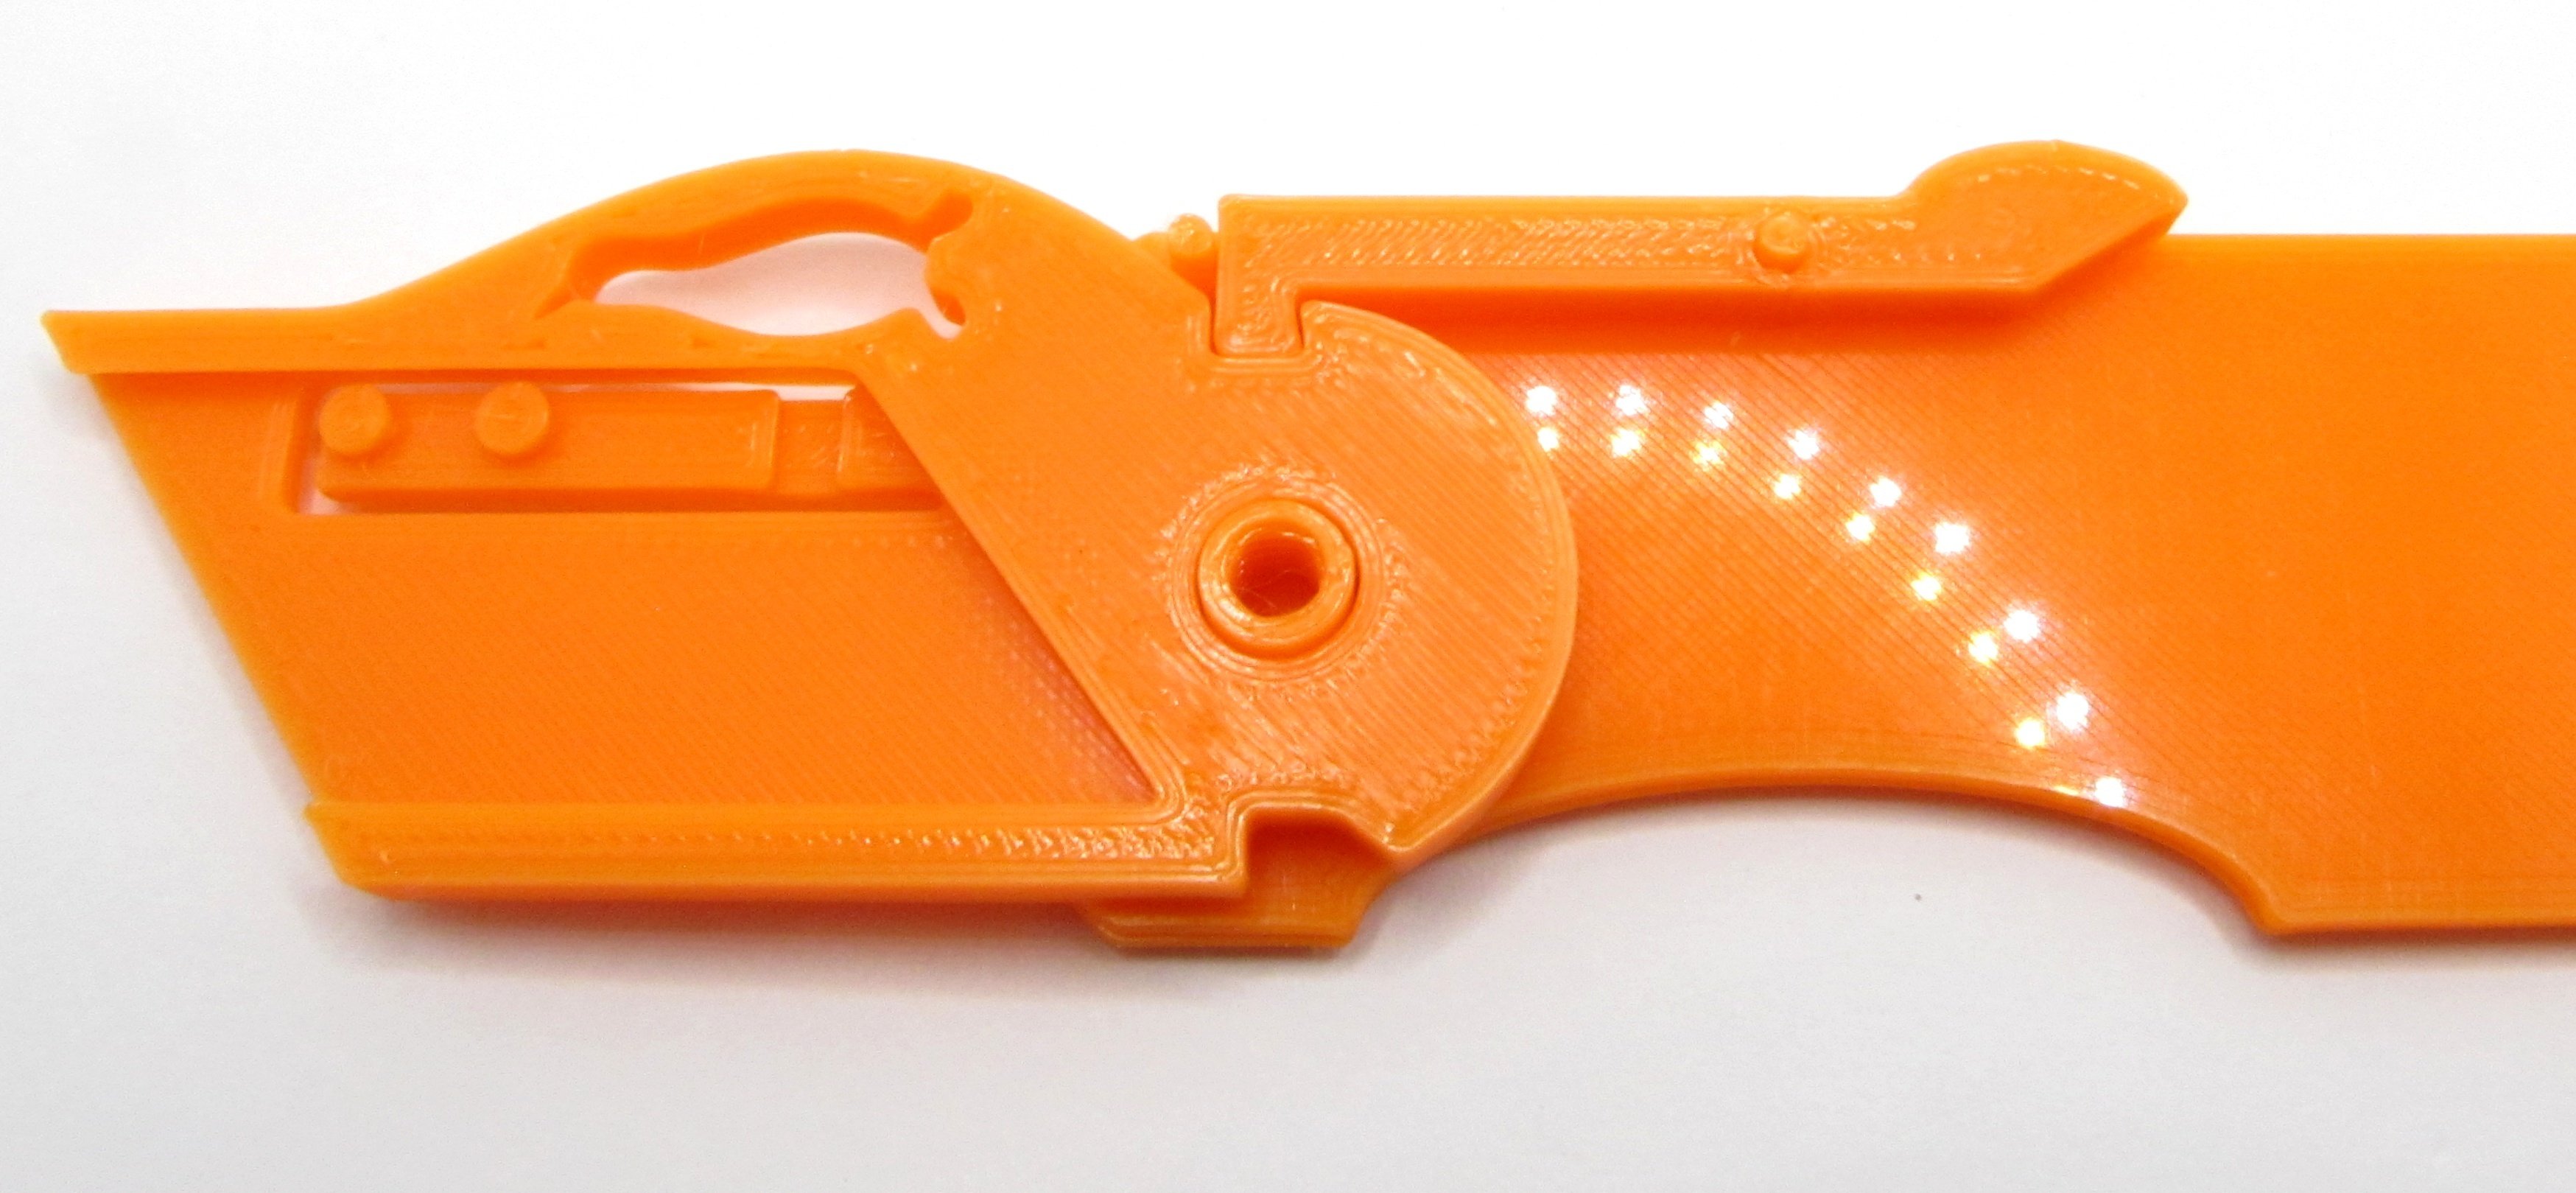
The spring block goes on next, and obviously the holes on it are for your last remaining pin plus the screw at the tail end of the knife. The prong on it goes below the end of the lock bar, i.e. on the inside. When you press the hump on the lock bar it should spring up and down satisfactorily.

Then the top liner goes on. All three pins should rest home in the holes in it.
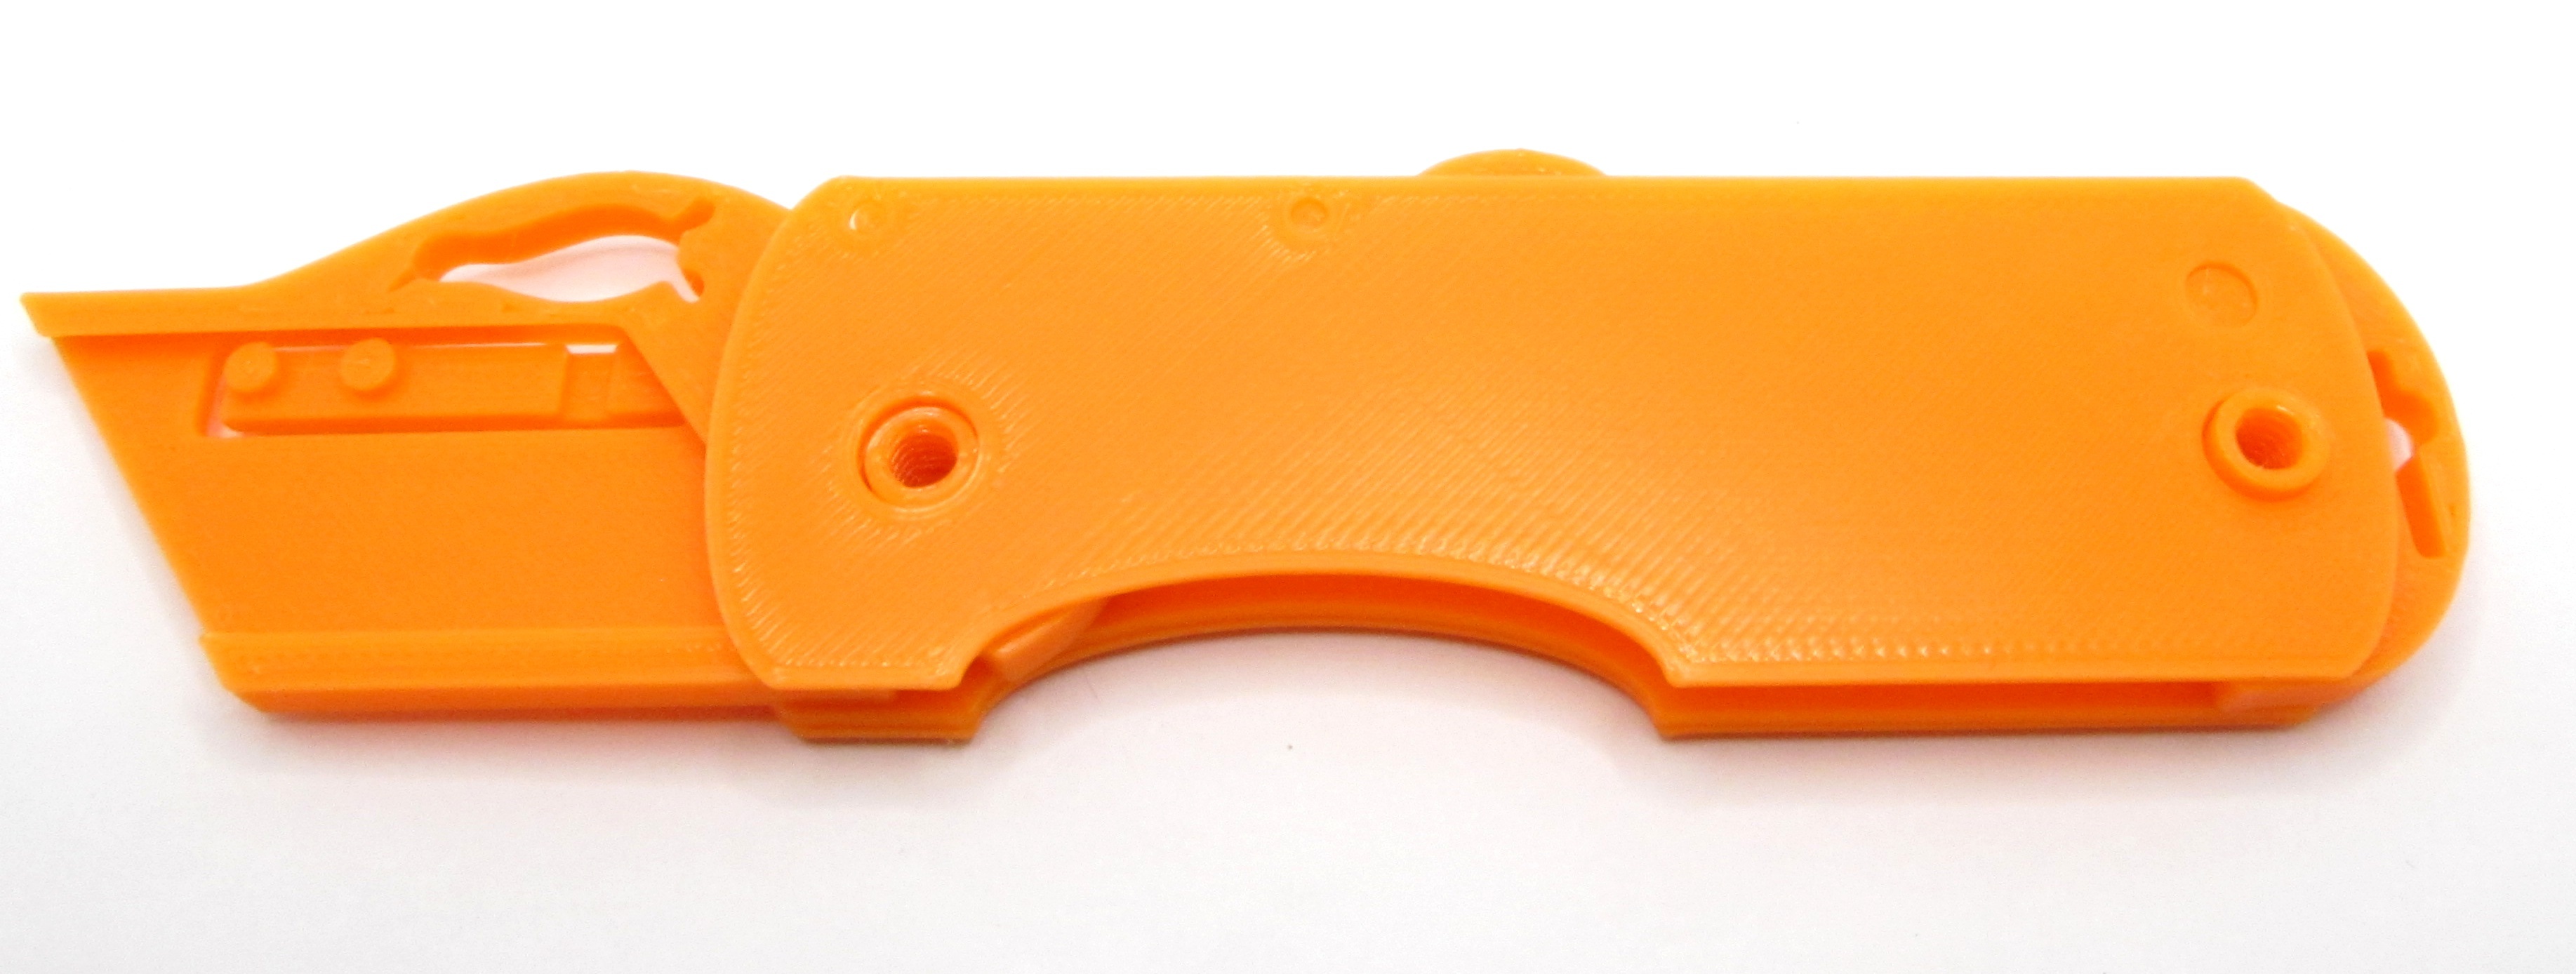
Then the top scale and its (male) screw. You can drive the screws with a penny if you’re too perverse to use a screwdriver.
If you’re going to use the pocket clip, decide which side you want it on (of course it’s reversible; I’m not an animal) and stick it through the slot on the tail end of the knife.
For strength, I recommend putting the female side of the tail screw through the clip, then through the rest of the assembly, and then put the male screw on the side that’s not holding the clip. Depending on which side you chose to put the clip on you may have to take it out and stick it through from the other side.
FYI, if you don’t use the pocket clip there is a hole in its mounting slot you can use to tie a lanyard through instead, if you’re into that sort of thing.
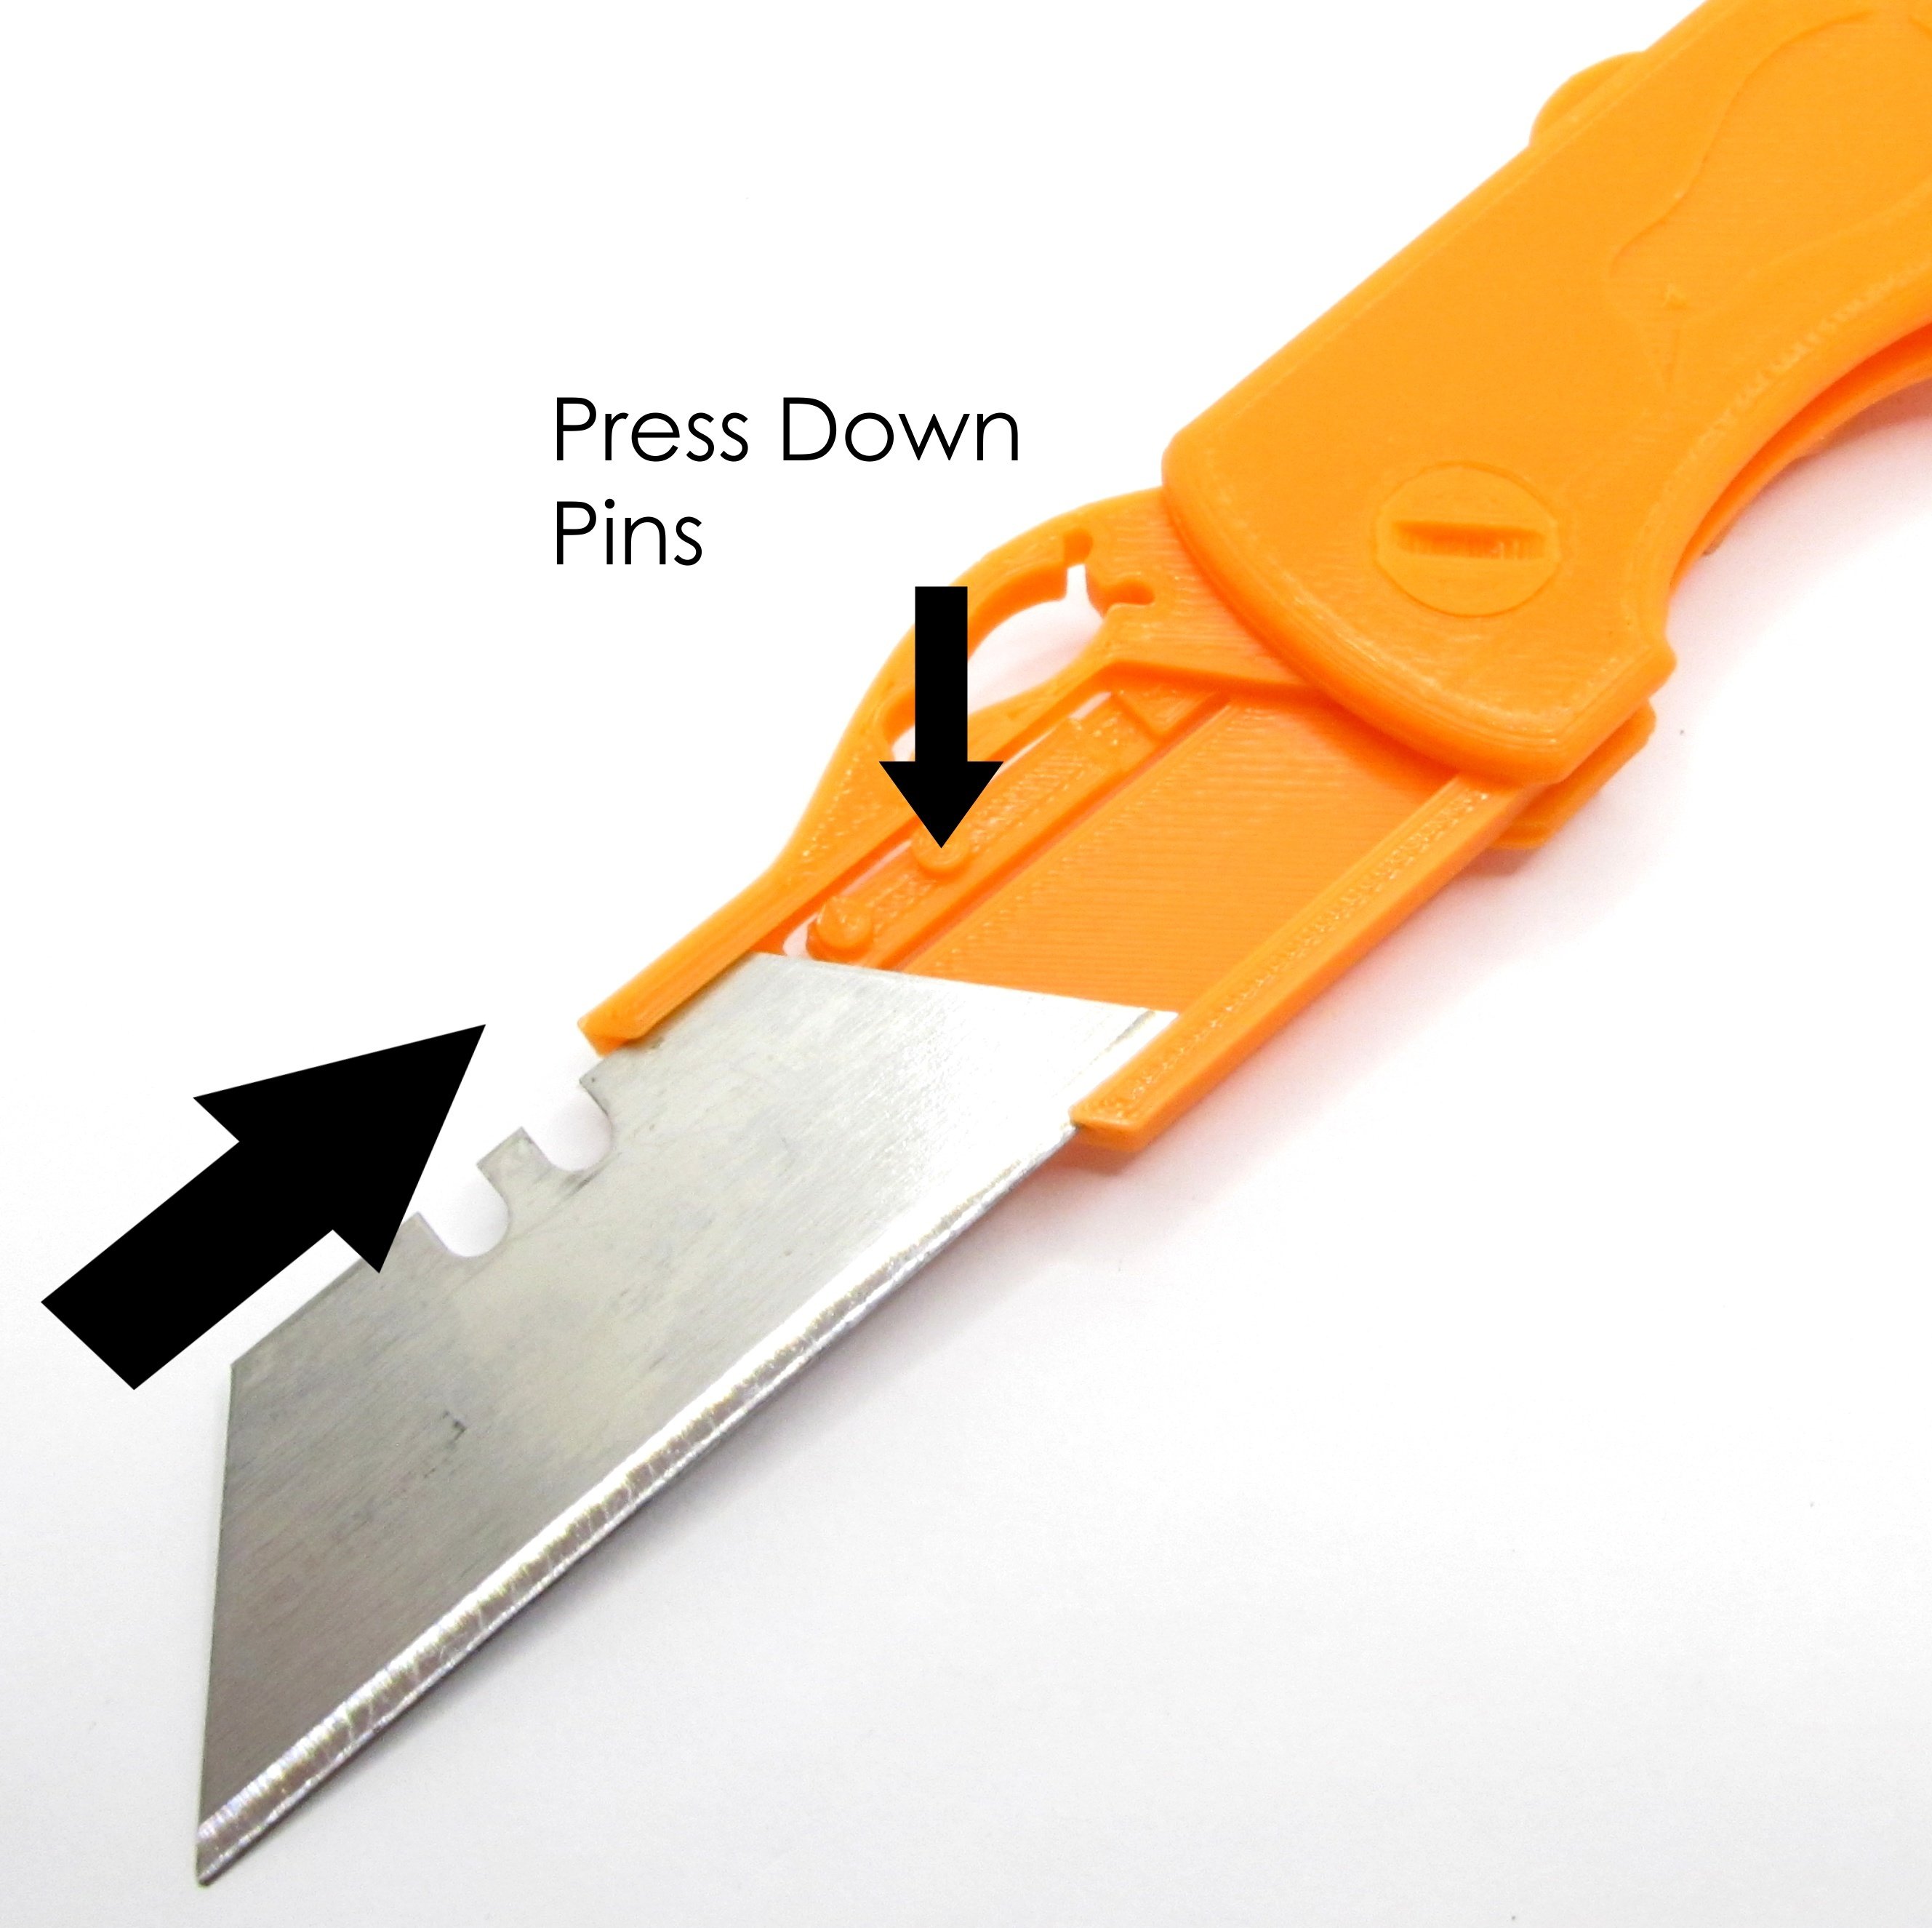
The blade slides in from the front and rides in a track that holds it on both the sharp edge and the blunt spine. Press the blade locking pin flexture down to get the pins to clear.
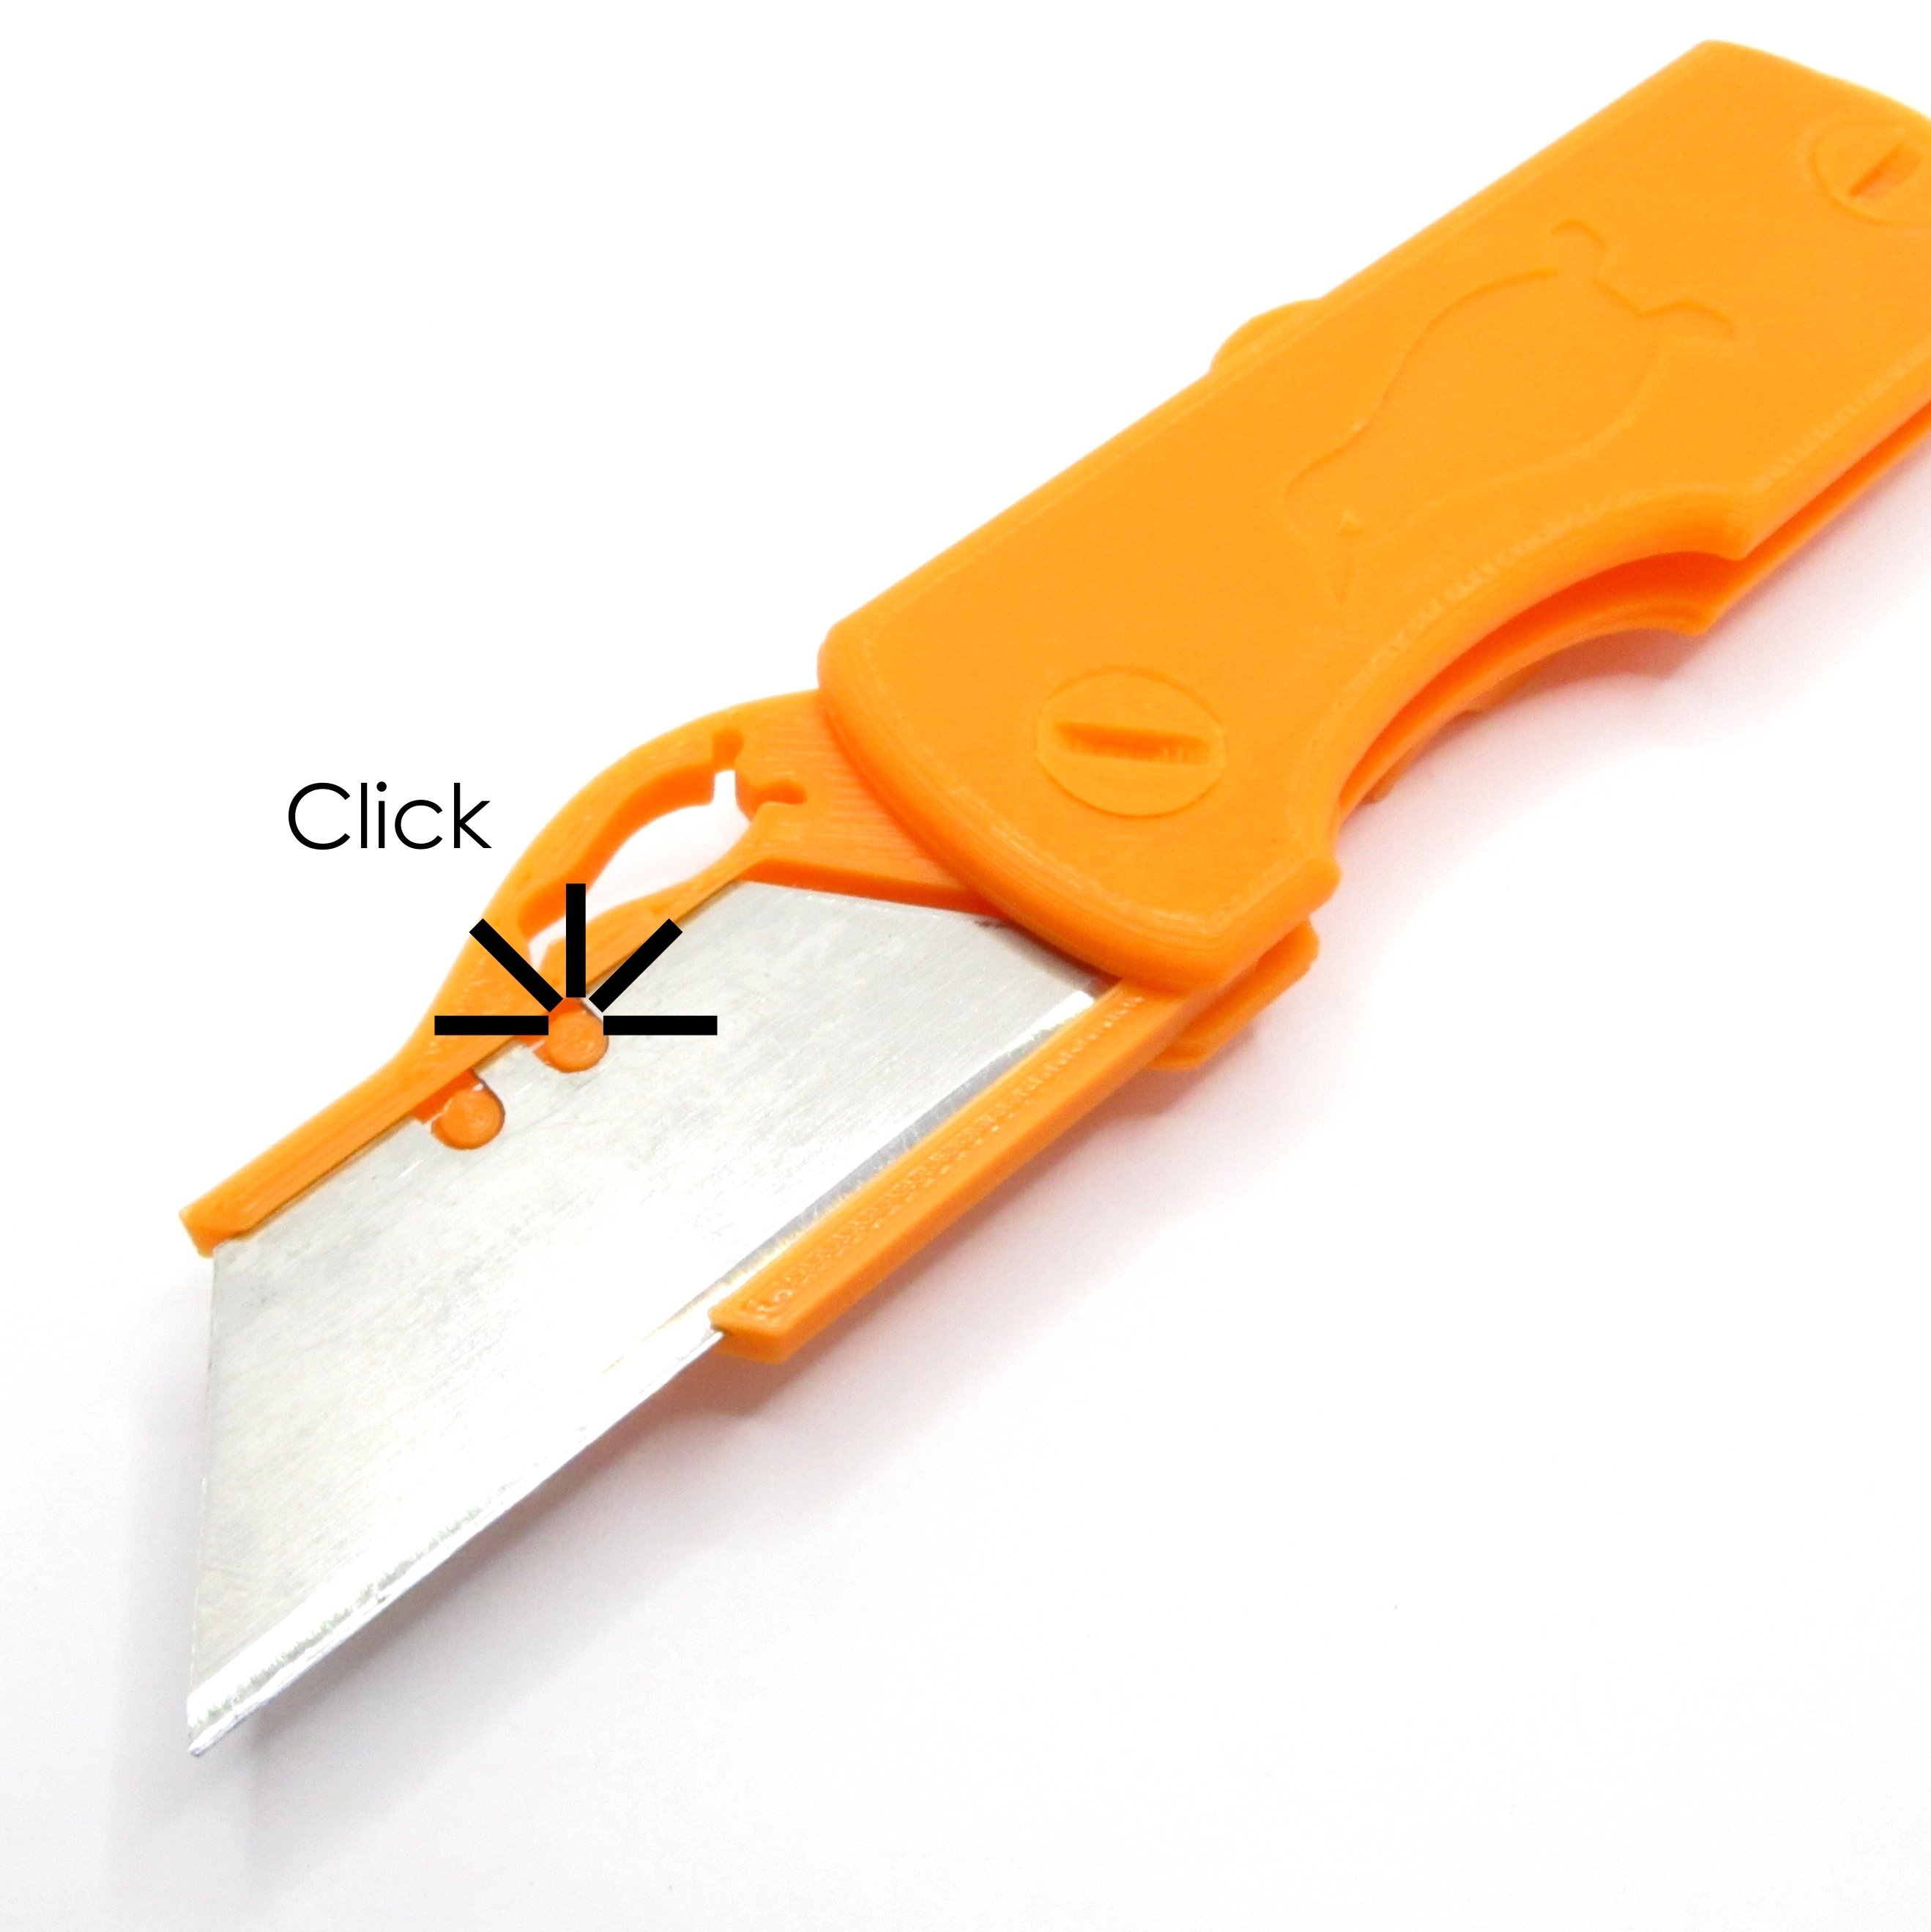
The pins ought to click into the two notches on your blade quite nicely. If you noticed that this is the same blade holding mechanism is very similar to the one on my last knife, that’s because you’re right and it’s exactly the same.
Fin.
You must log in or register to comment.
I don’t 3d print but I wanted to give you props for a super high effort post. This is really cool. If I did have a 3d printer I’d give this a try.
Have you thought about a version with blade storage? It’s always handy to have a place to stash an extra blade or two to quickly swap out a dull one.
Spare blade storage is an interesting idea. Lots of commercial metal utility knives have such a provision. Adding that would have the trade-off of making the knife slightly thicker, so maybe a separate set of handle scales for people who want that option could work.
You’d want some way to quickly access them as well, ideally without having to unscrew the handle, so it could be a (fun?) challenge figuring out how to implement it.
Love it. Respect the Penguin, man.
Very cool!
You never fail to amaze us lol. This is fantastic
deleted by creator
im here by accodent, didnt even know utility knives is a thing and i think you are ahero.
Thanks for sharing your hard work! Looks great!
Best Christmas Ever
deleted by creator

